Nothing is more frustrating than using an outside service to make emblems for a client only to open the box and find it’s not right. When you first start ordering emblems, you don’t know what questions to ask, which means you learn how to avoid mistakes by making them.
Here’s what you need to know to ensure your order is exactly what you need and meets the expectations of your client.
What Kind of Apparel?
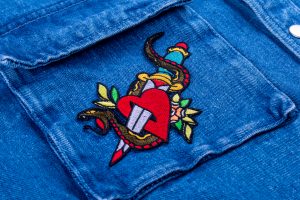
The first question is what substrate will the emblem be applied to? This determines if you need to sew, heat seal or use a pressure-sensitive adhesive to attach it.
Some emblems are heavier than others, so you want to make sure the garment is appropriate for the chosen emblem. Heavier fabrics such as cotton, poly-cotton blends, canvas and denim are relatively safe for any type, but if you are using a lighter-weight T-shirt, for example, be sure to check that your choice of patch will not weigh down the fabric or feel bulky against the skin.
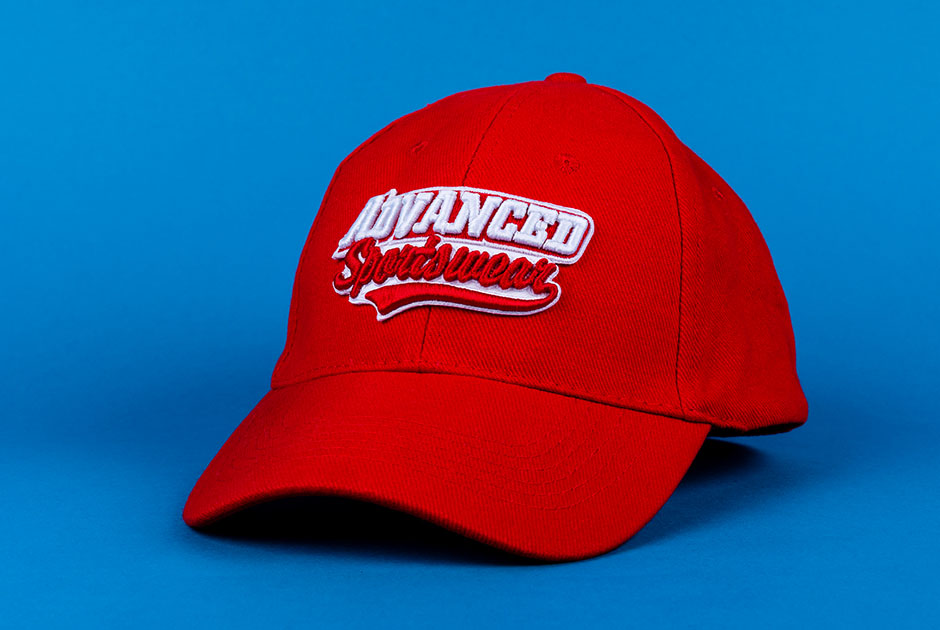
While traditionally, emblems were designed for apparel and fabric products, today’s patches are used in a similar fashion to decals and can be applied to coolers, portfolios and luggage or even inserted in plastic tumblers between the outer and inner walls.
Design & Digitizing Embroidered Emblems
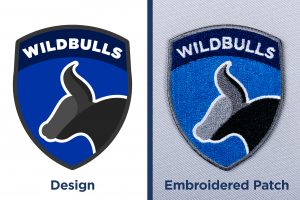
To create an emblem, the manufacturer will need a digitized file to sew it out. Some makers may offer design services. Others will depend on you to get the design created and digitized. Providing a ready-to-sew digitized file reduces the manufacturing cost.
Ideally, your graphic artist has experience creating a design that can be easily embroidered, printed or molded out of PVC. Familiarity guides the artist as to what works and what doesn’t. In general, “less is more” and “the simpler the better” rules should be followed when artwork must fit in a small space and you want the lettering to be readable from a distance.
Most fonts are available for embroidery. However, sans serif fonts are easier to read, especially with small lettering. Sans serif uses solid lines and smooth curves while avoiding little lines that add unnecessary clutter on an embroidered patch. Ariel B, Babas Neue and Veneer Solid are a few examples, if you want to check them out.

When designing an emblem follow two rules: “less is more” and “the simpler the better.” Don’t try to crowd too much in a small space and make sure sewn lettering is readable. Photo courtesy of World Emblem
A common challenge is when the client wants to include too many words, which can either be impossible to execute or difficult to read. You don’t want type size to go below 2 to 3 mm. Note: dark colors on light backgrounds reproduce better.
No matter who you have digitize your design, one of the most important steps is to proof the results carefully. You want to check for spelling errors, that the right colors were used, that there is sufficient thread coverage in all areas and that various design elements are aligned and not out of registration. Be sure to also take the time to evaluate the overall look.
While emblems are priced-based on stitch count, don’t skimp on stitches to save a few bucks. You want enough stitches to provide good coverage of the material, but not so many that they might distort or otherwise detract from the design.
Expect to view your emblem online or receive a sewout via FedEx for close inspection. Once you approve it, you are responsible for any mistakes. At that point, it’s too late to blame the manufacturer if it’s not what you wanted, so take the time to inspect it carefully and completely before signing off. When you do so, it’s always a good idea to have more than one person inspect it as well.
As a reminder, don’t put this task off as it will delay delivery. Most suppliers’ promised delivery times start upon receipt of the approved artwork, with the assumption that sample approval will happen in 24 hours. If you take two to three days to approve, expect production to also be two to three days later.
If you provide a digitized file to your supplier, be aware it will also be reviewed at their end to ensure it meets their standards. This is a common practice to prevent running into problems in production. If the file has issues that cannot be fixed, it will need to be redigitized.
Choosing A Shape & Size
The size patch you go with depends on how it’s going to be used and the type of artwork. You need a certain size to include a lot of fine detail. But a patch that’s too large may not look good on the garment and will increase the cost. If you’re not sure, your customer service rep can offer advice based on their experience.
All emblem suppliers are going to offer standard stock shapes, such as squares, rectangles, triangles, ovals and circles. However, pretty much any custom shape can be created. Examples include fruit, flowers, animals and states. The good news is a custom shape does not significantly increase costs.
For minimum and maximum size limits on specific patches, refer to your supplier’s website.
Thread Tips
Most of the time, embroidered emblems are sewn with polyester thread, since polyester thread is the most durable and results in the least number of thread breaks. Another advantage to polyester thread is it holds up to industrial commercial washing, so you don’t have to worry about the patch fading or deteriorating in the laundry. It cannot, however, be bleached. Bleach will degrade the thread.
Two exceptions to using polyester thread are if the job requires some kind of flame retardant or it needs to be reflective. PVC molded emblems are either applied using a heat-seal adhesive or they’re configured to be pressure sensitive, in which case no thread is involved.

It’s common for an emblem supplier to allow up to six colors for a flat price and then charge a slight increase for each additional color. Usually, colors are limited to a total of 15. Photo courtesy of World Emblem
Many emblem manufacturers stock up to 100 colors and have access to more if the need arises. If the job is color sensitive due to a client’s demands, you may want to get involved choosing which thread colors are used. Matches to PMS colors are often close, but not exact. If close is good enough, it is easier and will save you time if you allow the manufacturer to choose thread colors.
Special-effect threads are also available if you want to create a patch that really stands out. Examples include neon, glow-in-the-dark, variegated and metallic. These can be used as highlights or to add texture and interest to a patch.
For embroidery, many suppliers include six colors in their base price and then charge a small increase for any additions. It’s common for there to be a 15-color limit depending on your provider. PVC molded and sublimation patches, which are not made with thread, allow you to choose limitless colors. However, PMS matching is not guaranteed. Also, special effects such as neon, glitter and reflective colors are not available with these types.
Borders
There are a variety of borders available for emblems, and which type you choose will depend on what’s available and its purpose.
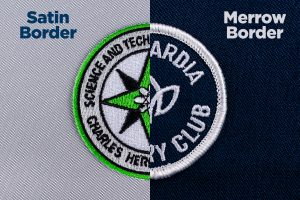
Merrow: Also referred to as “overstitch,” this is the traditional border most seen on an embroidered patch. It is also popular for use with sublimation and woven styles. It is great for simple shapes, such as rectangles, circles, squares and shields. However, it won’t work with irregular, custom-shaped emblems. Width is limited to 2-4 mm, and the thick, strong, durable border protects against fraying. Note, if a heat-seal adhesive is used, it cannot be applied to the edge. This does not affect the overall bond with the garment, but the edge is not affixed.
Overlock: This type resembles a Merrow border but is thinner and flatter. For some patches, it can be used as an alternative. It is commonly used with print-and-stitch and woven patches. It costs more than Merrow, but a heat-seal adhesive will cover the border, unlike with the Merrow.

You have a choice of borders when ordering a patch. The two examples illustrate the difference between a Merrow and Satin border. Each type has pros and cons, so be sure to discuss which type is best for your application and your provider. Photo courtesy of World Emblem
Satin: Another alternative to a Merrow edge for an embroidered patch is the satin border, which offers a soft, billowy edge and a smooth finish. Directly embroidered onto the patch, it is thinner and flatter than the Merrow type and looks more like a direct embroidery design when applied to a garment. Adhesive can be applied to the edges, and it is equally durable to a Merrow type. The Merrow is less expensive, but the satin border can be used on irregularly shaped emblems, in contrast to the Merrow which is good only for stock shapes, like squares, ovals and triangles.
Clean Cut: This is a thin, flat, discrete border that almost always matches the fabric of the emblem. It is used for only sublimated emblems. It is thinner than a satin border.
No Border: In some instances, you may want an emblem with no border, in which case the edge is laser cut and sealed, so it won’t unravel. A heat-seal adhesive will also cover the entire back, further ensuring no fraying when applied, making it as durable as any of the other patch styles. This type is popular when a custom shape is desired, such as a car or an animal. It is mostly used with an embroidered or sublimated patch.
Print Border: This type is used only on sublimated emblems and includes a “clean cut” style white border that matches the white polyester of the patch. When a sublimation transfer is applied, it seals to the entire emblem edge-to-edge, which means you cannot have a contrasting color for the border. It will match the rest of the patch. All sublimation patches start with white fabric.
PVC Emblems: The border on an emblem made of PVC or soft rubber is determined by the emblem manufacturer. Soft rubber patches can be ordered with or without a “channel” close to the edge to allow the emblem to be sewn on. Otherwise, it is heat sealed.
Randy Carr is the CEO of World Emblem, Hollywood, Fla., a company his father founded in 1993. It is a global supplier of a wide range of emblems and patches with multiple manufacturing facilities in the United States as well as one in Mexico and one in Canada. You can reach Randy Carr at [email protected] or visit the website at worldemblem.com.


