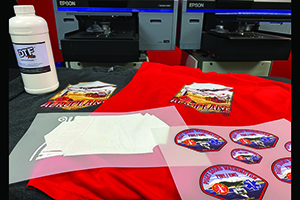
If you’re a direct-to-garment (DTG) decorator, have you found the colors in your prints to be less vibrant on certain brands and materials? This is a common problem with this printing method, as the quality of the shirt’s materials highly dictate how the resulting print will look.
However, there’s good news. With the direct-to-film (DTF) transfer process, you now can print DTG ink directly to a transfer sheet, then apply it via heat transfer to almost any garment. Even apparel made with budget fabrics, blends and 100% polyester all deliver outstanding results with this application.
The process is similar to screen printing on heat-transfer sheets, but now it can be done with water-based DTG ink.
Following is a step-by-step guide showing how it’s done.
Step 1:
Import the art into the raster image processor (RIP), then flip it. You will be printing the inverse. Print color first, then white. Some RIPs will let you print color first, then white. However, Garment Creator requires you to use two separate print settings. In this example, Garment Creator is set up to print color first, then white. Also, set it to lay down a light amount of color ink; too much will result in “puddling.”
Step 2:
Place the transfer sheet on the platen and raise it higher than you normallly would for printing a shirt.
Step 3:
Print the color ink first.
Step 4:
Now, set up Garment Creator to print white ink. Just as with the color ink, don’t lay down too much. Also, choke back the white underbase to at least 4 pixels. White ink goes down fast and because it’s printing on a transfer sheet, it looks very crisp.
Step 5:
Now that the sheet is printed, apply the heat-transfer powder. Pour it on the print and ensure the entire print area is covered. You can use a tray to keep the powder contained.
Step 6:
Once you have full coverage, the powder needs to dry. You can use a convection oven, conveyor dryer or heat press (shown). If using the latter, don’t close the heating element. When the powder dries, the transfers are ready for storage — for months or years at a time — or application.
Step 7:
Center the transfer and apply with medium pressure at 300˚F for 15 seconds. These DTF transfers must be peeled cold, so shake the shirt out or let it cool and slowly peel. Next, press the garment again at 300˚F for another 15 seconds. This will ensure the print is cured and vibrant. The final product will feel like a heat transfer; however, after one wash it will feel like a typical DTG print. One of DTG printing’s benefits is the water-based ink’s breathability and this method doesn’t inhibit that characteristic.
With this game-changing process, you now can expand the ways in which you use your DTG printer and increase
profitability.
John LeDrew is the DTG director for Melco Intl. He has worked professionally in garment decoration since 2006, managing accounts and overseeing production for some of the world’s largest brands and retailers. For more information or to comment on this article, contact John via LinkedIn.


