After more than 30 years as a screen printer, I’ve observed that the average shop is more of a screen maker than a screen printer. If you have ever taken the time to add the total amount of time and money invested in making screens, you may agree with me.
This is why your screen making department can make or break you. If your shop is not efficient at making screens, you most likely are losing profits without even realizing it. And even in well-run, successful operations, there’s always room for improvement.
I think many shops spend way too much time making and cleaning screens. Here are some tips that may help you save time and money.
YOU GET WHAT YOU PAY FOR
If you’re trying to reduce screen making costs, one of your last options should be buying cheap products and materials. I’ve visited countless shops where mineral spirits and lubricants were used to clean screens. Some of these everyday products may remove rubber cement from clothing, but they should not be used to remove plastisol ink from mesh.

Printers who use these methods don’t realize the host of problems created by using products not intended for the purpose of screen making and cleaning. Although a product may cost more, it often either accelerates the process or eliminates downtime later in production. At the end of the day, what you save in time more than makes up for the higher cost.
When choosing products to make and clean screens, first find out what questions you should ask and then talk to a variety of screen printing suppliers about the products that are best for you. Then, make sure you use them properly.
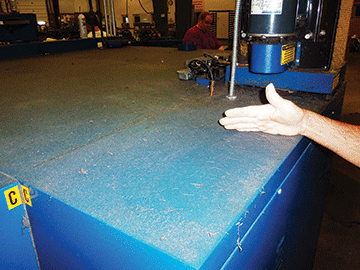
CLEANING HOUSE
While an apparel screen printer technically can be termed a value-added reseller, I contend that what we really manufacture is lint. If you print T-shirts, there is no avoiding the ton of fluffy fibers that are floating around your shop and landing on the floor, walls and your equipment. If these areas are covered with adhesive and grease, those fibers will stick there.
If you do not regularly clean all surfaces of lint, where does it go? Typically, it lands in your freshly coated emulsion where it creates a pinhole that shows up after you wash out your exposed screen.
Want to save countless hours fixing pinholes? Schedule regular cleaning time to rid your shop of dust, dirt and lint.
GOING TO JAIL
There’s no arguing that cleaning screens is not the most fun job in the world. For this reason, the general attitude toward the screen cleaning department is that an employee is “sentenced” to it. If someone is late, has been making a lot of errors or has some other fault, he is banished to the screen cleaning area.
That mentality is backwards. Do not assign an employee to the screen room who is not adequately trained or is having problems. To do so is to guarantee that more problems will crop up, namely on the screen printing press. This stops production and your ability to make money.
LIGHT-SAFE ENVIRONMENT
Every emulsion has an area of optimal sensitivity. Typically, the ultraviolet sensitivity falls in the 380- to 420-nanometer range, depending on the type of emulsion you use. You need an area where you can control light to make sure it does not pre-expose your emulsion.
The most common way to do this is to either use correctly filtered yellow light bulbs or to cover the white lights with a UV light filter that can be purchased at most screen printing and graphic arts supply companies. (Note: Bug lights do not block the correct wavelength of light; just because it is yellow does not mean it will work.)
Regardless of the emulsion you choose, find out from your supplier what its ultraviolet light sensitivity spectrum is and make sure your screen room light is modified accordingly. One trick I have used, which has been very effective, is to paint the screen room using yellow (PMS #122U) enamel.
Enamel paint is easily cleaned with a sponge and bucket of water. This makes it easier to keep the room free of dust and dirt. At my shop, we wipe down the screen room at least once every couple of months. A Swiffer dusting cloth is the most powerful anti-pinhole tool you can own.
Don’t forget the ceiling! If you have ceiling tile, it should be painted yellow. Otherwise, light can sneak in, bounce off the ceiling and pre-expose your screen.
MOISTURE AND HUMIDITY
It also is really important to control moisture and humidity in your screen room. This will make a big difference in your ability to have consistent, predictable, repeatable screens. To create a durable stencil that will hold up for the length of the press run, you must ensure all moisture has been removed from the emulsion.
Ideally, the screen drying area should be below 30% relative humidity. The easiest way to measure the humidity is to purchase a humidistat combo temperature gauge, which can be found at your local hardware store.
A quality direct emulsion consists of about 40%-44% solids and 55%-60% water. If you coat a batch of 50 screens and put them on a rack to dry in a screen room, that is equivalent to pouring a half-gallon of water on the floor, which will raise the relative humidity to 50%-70% in 10 minutes or less. To remove that excess water, many shops use a dehumidifier. You also can use an air conditioner.
Regardless of the method you use, you must consistently get the water out of the environment and lower the humidity level or your emulsion will not dry. I’ve seen decorators use a space heater for this, although I don’t recommend it. If emulsion is heated to more than 80ºF, it can start to pre-expose, and you may find that the heat has converted your emulsion to a solid.
Another factor to understand is that no matter how much heat you put into the environment, if the humidity stays in the 50%-60% range, your screens will not dry.
Some small shops use a bathroom as the screen room. It is a small area in which light can be easily controlled with the flip of a switch. That is fine and can work, but if you don’t have a way of removing the moisture, drying the screens will take forever.
IS IT DRY YET?
The worst possible way to determine if your screens are dry is to use the touch-and-feel method — running a finger across the surface of the emulsion. If it is dry to the touch, then the tester assumes the screen is ready for printing. It is not.
A good analogy is to compare emulsion to a lemon meringue pie. When cooked, the meringue forms a dry crust, but when you cut into it, the inside is soft and gooey.
Emulsion can be dry on the surface, but still moist underneath. If there is moisture in the emulsion when it is washed out, the necessary cross linking has not happened and your stencil will be washed away. The emulsion must be 100% moisture-free.
GETTING PROPER EXPOSURE
A good way to test whether your emulsion is fully exposed is to find a white cotton towel (a rejected white T-shirt or paper towel also will work) and moisten it. On the side of the screen that was not directly exposed, rub the area with the towel. If any emulsion dye color transfers to the towel, you have an underexposed screen. Depending on the emulsion you are using, it might be blue, green or pink. If there is color on your wipe at this point, get out the exposure calculators and start over.
Any company that sells emulsion has these calculators. They are simple to use and every gallon of emulsion you buy comes with information that explains how to use the calculators. If you are still struggling, I recommend asking your supplier’s tech sales rep to assist you.
This is a common reason why printers have premature breakdowns on press. They get in a hurry and don’t control their humidity, temperature and exposure.
Another typical scenario I see in less experienced shops is the screen person standing in the back with a garden house trickling water across an exposed screen. I have seen people take 30 minutes to wash out a screen because it was not properly exposed.
Normally, washout is done with a high-pressure sprayer; a properly exposed screen will easily survive a high-pressure washout. But underexposure forces the operator to baby the screen by slowing the removal of excess emulsion. The best way to avoid this scenario is to use an exposure calculator so you know exactly how long to expose the screen.
The many parameters that must be taken into consideration make getting the right exposure a challenge. Are you using a fluorescent, ultraviolet or high-density metal alloy light source? What kind of emulsion are you using? How old is your bulb? By using an exposure calculator, you take out the guesswork and save time and frustration struggling to get it right.
MAKING THE POSITIVE
To make a screen, you have to create a positive, which is a piece of film that is used as an ultraviolet mask on an emulsion-coated screen and then exposed to light. If you use a computer-to-screen (CTS) system, the unit sprays water-based ink or wax onto your screen to create the UV mask.
Creating a good positive is key at this stage of the process. It has to be opaque enough to block UV light. If the light burns through the positive, the exposure time has to be reduced or the stencil will not hold up during washout.
This is an area where buying cheap products saves you money in the short run, but costs you in the long run. Printers may think they are saving $0.25 to $0.50 per screen by buying an inexpensive vellum or $2 per screen by using vellum instead of an inkjet film. But instead, they are spending an extra 10 minutes each time they wash out a screen. The value isn’t there.
SEEING THE LIGHT
Another cause of underexposure is a weak light source. Bulbs get old and lose the ability to convert emulsion. Oxidation from the bulb’s element starts to deposit on the inside of the glass, preventing it from outputting the correct UV-rich amount of light.
If your screen exposure unit has an old bulb, it may not be able to penetrate the emulsion, which is necessary to harden it into a stencil. Thus, when you wash out the screen, the stencil doesn’t hold.
Whereas a new bulb may fully expose a screen in 30 seconds, an older bulb may take 30 minutes. This is another area of false economy where printers delay buying a new bulb for the exposure unit because it may cost $200.
However, they are more than willing to stand there for 10 minutes, up to 20 times a day, to let a screen expose, when a new bulb would do the job in two to three minutes.
How do you know when a bulb needs to be replaced? I advocate using log sheets in your screen making area. This is a simple grid that documents the number of screens you expose and the amount of time it took. It can be done on a Microsoft Excel spreadsheet, whiteboard or a piece of paper stuck on the wall, but your staff should know what is expected from them and their equipment in terms of how many screens should be exposed per hour.
At some point, instead of exposing 20 screens an hour, this number drops to eight or 10 — and that is the warning sign that it’s time to buy a new bulb.
These are a few of the areas that impact the efficiency of your screen room. By ensuring you are using the correct products and procedures, you can save a lot of headaches and spend your day making money instead of wasting time.
Greg Kitson is founder of Mind’s Eye Graphics, Decatur, Ind. For more information or to comment on this article, email Greg at [email protected] or visit mindseyeg.com. Hear Greg speak on apparel decorating topics at the 2013 Imprinted Sportswear Shows (ISS). Reduced workshop and seminar rates are available if you preregister: issshows.com.


