Pulling a squeegee on a manual screen-printing press and transforming a blank T-shirt into a colorful piece of commercial art is one of the most ubiquitous starting points for jobs in the decorated apparel industry.
Whether it is a basement- or garage-operated shop, or a large-scale industrial printer, manual printing always is in high demand. It seems so easy, but not everyone can do it.
There’s a basic mixture of craftsmanship, technical skill, science and, of course, some old-fashioned elbow grease. What are the key traits and skills that a rookie printer should know to be transformed into a seasoned, highly skilled master of the craft?
Below is a guideline to master the “Zen” of manually printing T-shirts and making a big mark in any shop.

ORGANIZATION & CRAFTSMANSHIP
Setting up a job or breaking one down is a comprehensive ballet. As shops are only making money when shirts are being printed, the faster a press operator can break down an older job and set up a new one, the better. Being organized and self assured are helpful when it comes to using the tools of the trade.
Newer printers tend to be less organized and unsure of themselves when it comes to these steps. The transitional periods take longer, as they don’t develop the rhythm of an old hand. Having the tools in the same locations translates into the reduced wasted motion of operating the press, and you can get more jobs done in a day.
Review how the area around your manual press is organized. Remove any clutter or unneeded items and prioritize anything that will constantly be used, including tape, markers or pens, a T-Square, squeegees, palette knives, etc. These should be ready to grab and returned to the same spot each time. Keeping these items handy and in the same location increases your muscle memory and makes working throughout your day a smoother operation.
To increase the throughput for a manual press each day, organize and line up all shirts, screens and ink buckets used near the press so you can quickly cycle through the orders. A novice printer should be able to print a dozen or so orders a day, while a seasoned veteran can knock out 20-30.
TOOLS OF THE TRADE
Squeegees are a critical component in the screen-print process, as they transfer the print motion and energy from the printer down through the screen and onto the shirt.
In general, most printers use two or three different squeegee types daily. The lower the durometer number, the softer the squeegee’s rubber. Most printers I know like a soft 60-durometer squeegee to lay down a thicker ink deposit when needed. For a harder squeegee that will push less ink through the screen, a 90-durometer blade can be used. For in between, a triple-durometer 70/90/70 often is preferred. Printers will have these squeegees in multiple squeegee holders in different widths for multiple color jobs and image sizes. Regardless of the durometer, the squeegee blade should have sharp, crisp edges where it will contact the screen.
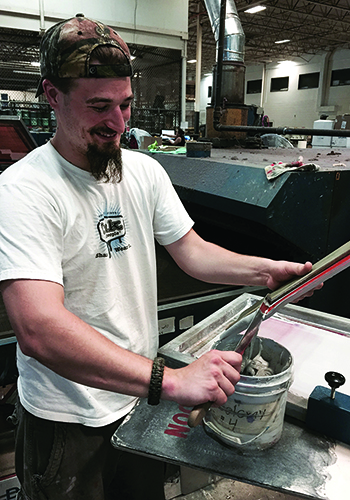
To scoop ink from a bucket and fill a screen top, manual printers prefer a palette knife that has a flexible 6- to 8-inch blade. This tool allows for fast ink loading and clean up, but if any additives need to be mixed into the ink, it can quickly be done in the screen. For cleanup, the long blade can scrape a good bit of ink from the screen and it can be loaded back into the bucket with ease. While automatic screen printers tend to use stiffer and shorter putty knives or plastic “goop scoops,” these long, thin-bladed palette knives are a versatile and mandatory tool for manual printing.
PREPPING TO PRINT
Getting a job set up quickly is key to a productive day. Set up the work so that the screens can be registered quickly, accurately and get approved on the first try. A decent operator should be able to do this in an average of five minutes per screen. A veteran operator can do it in half that time, thanks to a few tricks of the trade.
First, the press platens are set up with some key landmarks that are used for quick registration. The platen is measured, and a T-Square is used to divide it with a bold, easy-to-see vertical mark down the center. This aligns the registration marks from the screen so that the image is centered perfectly. When the T-shirt is loaded onto the platen, the bottom of the neck collar usually hangs off the edge of the platen.
Screen off-contact also is important, as your screen mesh will give a little bit when you pull your squeegee when printing. Ideally, when the screen is down, you want between 1⁄16- and 1⁄8-inch distance between it and the garment. Leaving this gap allows for the screen to snap back into place when printing and keeps your image clean afterward. Most manual presses have an adjustment for this, and you usually can use a piece of cardboard to help adjust. The screen needs to be even and level, and you can use a ruler to verify.
When printing multicolor jobs, if you set up your screens to go from lightest to darkest or smallest image to largest, you usually can print without flashing between colors. This allows you to produce more jobs at the end of the day, as you aren’t waiting a few moments between flashing sessions.
Once this screen is loaded, aligned and locked into place, the printer can load the screen with ink and pull a test print. Usually these are “junk” T-shirts, which are printed and reused for this purpose. The test print is flash cured so it is dry to the touch. Other screens can be registered to this test print and locked into place.
For multicolor prints, each screen is loaded and registered to the rest until all are in perfect registration with respect to each other. The shirts for the job should be loaded onto the table or cart used to place the garments next to the press. This should be at a comfortable height, and the shirts should be easy to reach and load onto the press with a smooth motion. The ergonomics of this are important, as you should be able to grab a new shirt from the stack and load it onto the platen in one smooth motion.
PRINTING THE JOB
To begin the printing process, each shirt is loaded onto the press and smoothed out by hand so there are no wrinkles. The screen printer then should pull the screen down and, with his dominant hand, flood the screen with ink; all in one motion. This fills the stencil with ink, a crucial step in achieving a good print. Completely coat the image with a thin, even deposit, but don’t push ink through the screen.
Ink viscosity is important to how you will print. Any printer will tell you smoother, creamier ink is better. While there are plenty of additives you can stir into the ink to keep it creamy, just simply stirring it in the bucket or working it with the pallet knife on the screen for a few moments will work wonders for your print stroke.
Once the screen is down and the ink floods it, pull the squeegee and shear the ink from the screen onto the shirt. The lower the angle of your squeegee, the more force you will give to the procedure and more ink will go through the mesh. Ideally, you want a sharp 70- or 80-degree angle. Press hard through the stroke and concentrate on making a clean, balanced, smooth motion.
The result should be a nice clean print that lays flat on the shirt and covers all areas evenly. The key to becoming a great manual printer is developing a print stroke that it smooth and efficient. Too much pressure with one hand or the other can produce sloppy ink deposits on the dominant pressure side. Insufficient pressure, however, can produce too light of a print that shows the grain of the shirt in the print areas. If the squeegee angle is too low or high, there will be too much or not enough ink transfer. Like anything, practice makes perfect.
There currently is a lot of debate about whether it’s better to pull or to push the squeegee. Do whatever is comfortable for you. Regardless of your preferred method, you have to only do it that way when printing. You can’t switch it up in the middle of a job, as that will lead to misprints and probably a mess.
Some people like to grip the squeegee from the top, while others choose to hold it a little wider or more to the side. Regardless of the grip you choose, just ensure you can do it all day.
On some jobs, you can print wet on wet without a problem. This will allow you to print much faster, and you’ll produce more shirts at the end of the day. However, if you are printing over an underbase or have blocks of ink color touching, you will need to flash cure the shirt before printing the next color.
A flash unit is a small heater that completely covers the platen area and usually is placed on the opposite side of the press from where the screen printer stands. This device either works with a motion sensor and can detect a platen swinging underneath, or it can be linked to a foot pedal switch for printer control. Flashing the ink gels it so it is dry to the touch. However, don’t mistakenly think the ink cured; the shirt still will need to go into the dryer.
Marshall Atkinson is the chief operating officer of Visual Impression Inc., and Ink to the People, Milwaukee, Wis. Atkinson is a frequent contributor to Impressions. He also lectures on sustainability at Imprinted Sportswear Shows (ISS) events, and has participated numerous industry webinar panel discussions and keynote addresses. He serves on the board of directors for the Sustainable Green Printing Partnership (SGP), several SGIA leadership committees, and is a PromoKitchen chef. You can contact him at [email protected].
Suggested Reading:
Like this article? Read these and other screen printing articles at impressionsmag.com:
• “Halftone Printing on Textiles”
• “Screen-Making Techniques”
• “Screen-Making Techniques, Part 2”


