If you know me, then you know that screen printing is and has been a part of my life for more than 46 years. Since the first time I screen printed as a teenager, I’ve been hooked. For me, screen printing is not just a means to put an image on a shirt, it’s also an art form. Over the years, I’ve seen trends come and go, print machines evolve and screen-printing inks become specialized and more efficient.
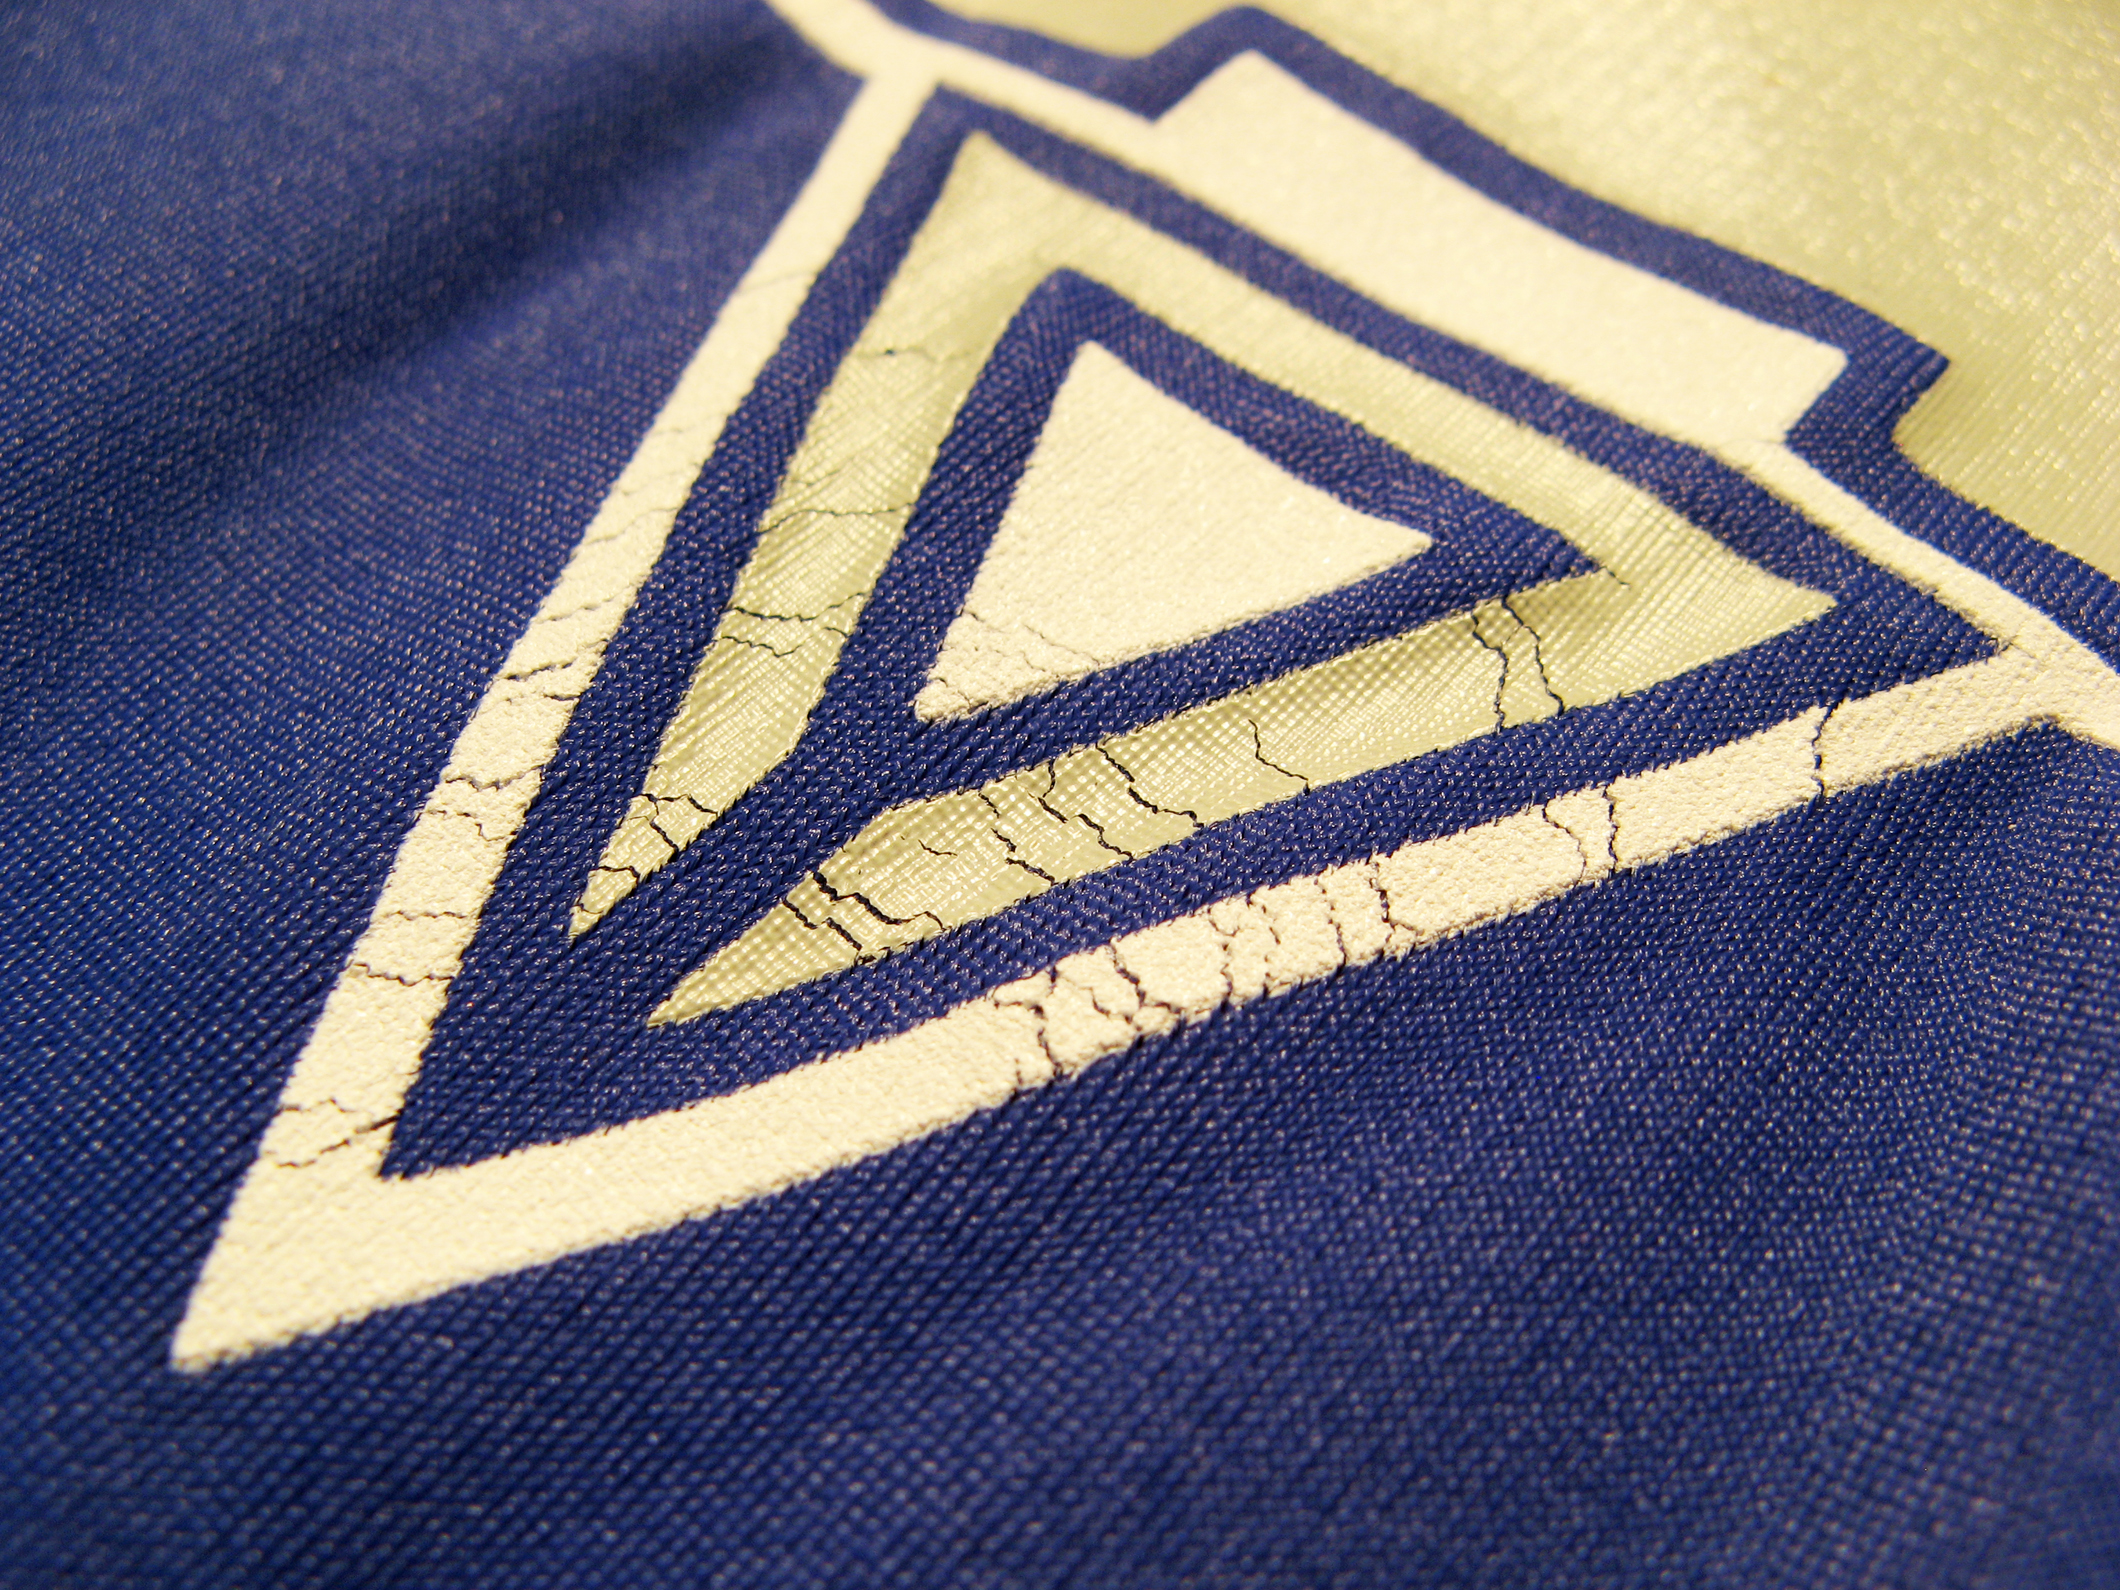
A simple way to test whether the ink is cured completely is to do a stretch test. If the ink does not crack while the fabric is stretched, it’s cured. Photo courtesy of International Coatings
One thing that has stayed the same all these years: What falls off at the end of the dryer is NOT the ink’s fault! YOU own it!
You are the last line of defense for everything that happens prior to laying the garment onto the dryer. Some of you might be balking at this idea right now but let me explain.
I get called in to situations when there’s a problem. Most of the time they blame the ink, and 99 percent of the time it’s not the ink, but something else. The ink is probably the most consistent thing you have in the shop, maybe that and the emulsion. These inks are tested in a laboratory prior to being released for sale, whereas most shops do not have the ability to perform the types of tests the laboratory can. Yet, the shop owner will call me because they “feel” that it’s the ink’s fault.

There are many factors that can affect the outcome of a print, and I’d like to address some of the most common ones, so that you won’t get to the “now what?” point at the end of a print production. There needs to be checks and balances way before the final print falls off the dryer to assure that the results are as perfect as can be. What follows are a number of the more common sources of trouble when screen printing—problems that, again, have nothing to do with the quality of the ink a company is using.
Garments: If the garment isn’t correct—meaning the size, color or construction quality—you are the one who applied the graphic to it. Whether the garment was supplied by you or the customer, it’s your responsibility—and the cost to reprint the job on the correct garment can be costly.
Image Placement: Whether you printed the left chest image on the back by mistake or the back image on the front or whether you accidentally taped off a portion of the logo or trademark—again, that’s your mistake. (By way of example, on my real first professional print job back in 1981, I printed the REMO drum head logo on the back instead of the left chest of 72 brown sweatshirts. Not good!)
Ink Type: Did you use white ink made specifically for use on a cotton garment on your 100-percent poly red shirt or use a poly ink on a 100-percent cotton garment? Both are no-no’s. Let me explain: If you use a standard cotton white on some dark polyester fabrics, it’s possibly some of the color or dye from the polyester can migrate or sublimate through your ink and alter the ink color. Using ink specifically to print on polyester fabric can help prevent that from happening if used and handled correctly. Keeping the cure temp as low as the ink will allow and cooling them off immediately after curing will also help prevent dye migration.
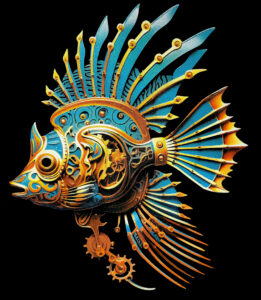
Gel gloss was integrated to some of the “spines” and other features of the fish to achieve that underwater look. Photo courtesy of International Coatings
Similarly, when using ink for polyester on some reactive dyed cotton fabrics, it is possible, under the right circumstances, to have the polyester ink bleach or “ghost” an image on any cotton fabric that it touches. Ghosting only happens when you use certain low bleed and 100-percent polyester white inks on cotton fabrics that are still hot and have some moisture remaining within the fabric. If the printed fabric is left in contact with reactive dyed fabrics while hot, you may create a ghost image of the polyester ink print on the reactive dyed fabric.
If you run into such a problem, here’s a tip—cooling the garments off directly out of the dryer will help prevent the ghosting from happening.
Dryer Settings: Did you make sure that the dryer temperature is correct for the type of ink being used (low-cure vs. regular cure type inks) or for the type of garment you are printing on (100-percent cotton vs. 100-percent polyester for example)?
While heat is vital for curing and fusing ink, finding the sweet spot is key to avoiding energy waste and maximizing profitability. Heat is a necessary evil. You need it to do the job, but any excess turns it into an enemy.
Under-curing is the problem I encounter the most when people complain about the ink. Use a temperature gun aimed at the inside of the dryer to measure the temperature more correctly. Slow down the belt speed if needed. Typically, the ink should reside in the dryer at least one full minute at the cure temperature suggested by the manufacturer.
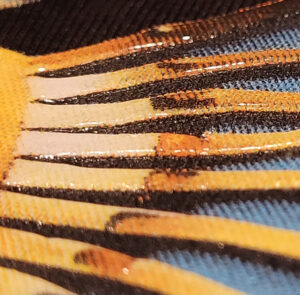
Close up of the FX Gel Gloss application on the spines. Photo courtesy of International Coatings
If you do detect that the ink is under-cured, be careful not to run the ink through the dryer a second time at temperatures that still would not cure the ink. For example, at 250°F (121°C) the ink will still be heated to only 250°F (121°C) and still will not cure if it needs to hit 280°F (138°C) for it to be fully cured, no matter how long you run it through the dryer.
Ink and Screen Rooms: You can learn a lot about a screen-printing company just by looking to see how seriously they take their ink and screen rooms. These areas are key stages of the screen print process. Strive to streamline these critical stages. It’s kind of like looking into a restaurant’s kitchen—a lot can be learned about how the food will taste when you see the kitchen in which it is prepared.
Are there pin holes creating little spots of ink on the garment? These pesky little dots may not show up on your first few shirts or even the first 1,000 shirts but can develop while the production run continues. So, check your screens—and prints—frequently throughout the day.
For the most part, these holes can be practically eliminated by creating a clean, dust free and dry environment in all your screen-prepping areas.
Create profiles for your coating and exposing department, then create and maintain a proper ink kitchen. The profiles will help keep your prints consistent from operator to operator and from customer order to their reorder. This simple implementation will save you countless hours and dollars over the years.
Monitor Constantly
Many printers try to make screen printing a “set it and forget it” type of business, but it simply will never be. There are countless things that can change throughout a production run, whether it is a simple 100-piece run or 100,000-piece run. The numerous factors involved make a “set-it-and-forget-it” approach unrealistic, expecting the 1,000th print to be the same as the first. Consistent monitoring is key.
Plastisol inks, for example, are thermoplastic, so you can expect an ink that has been exposed to residual heat from pallets that have passed through multiple flashes to change its characteristics as printing progresses.

To achieve the thick layers of puff that were incorporated in this print, the ink must meet the correct temperature. Photo courtesy of International Coatings
At first, the ink will become creamier and thinner as the squeegee agitates it by going back and forth. However, over time it will start to thicken, or gel, as the heat from the pallets affect sits thermoplastic characteristics. Thinning and thickening will alter the ink’s opacity and may cause variations to your design throughout the duration of the production run. The print you get at the end of the production run may not look like the sample that was approved at the start.
Not all inks are created equal. Some brands may use a large percentage of liquid thickener in their products, which can exacerbate the problem. Inks containing liquid thickener may start out thicker, but the ink will liquify to a thinner viscosity during the production run. This additional factor could introduce instability in the viscosity of the ink, which could in turn affect the opacity of the print.
Another factor could be the weather. Let’s say you have a job for 100 shirts to print manually, which can be printed in one day. In this case, you can assume the weather will be the same from the first print to the last. If, on the other hand, you are lucky enough to land a 100,000-piece job on an automatic, then you may be printing the same image for 20 or 30-plus days. (3,000 prints per day x 33.5 days is 100,500 shirts). Any change in the weather over the course of the production run can influence the garments’ moisture content and the dryer temperature.
If you are printing a large job, consider burning a second set of screens to save on down time in case one of the screens rips. It would be great if all the screens last over 100,000 prints, and it may even be possible but…the cost of the extra screens pale in comparison to the hour of downtime in case a screen (or multiple screens) must be prepped for replacement.
Other Factors
Even though we like to think that plastisol ink formulas are complicated and sophisticated, it ultimately comes down to only a few ingredients that affect the curability of each batch created. I can assure you that every batch we produce is thoroughly tested for curability as part of our standard quality control procedure.
It can be assumed that all manufacturers thoroughly test every product they produce as well. However, it is impossible to test every batch of every garment produced. Garment manufacturers are constantly tweaking their dying processes, and it’s nearly impossible to keep track of all the garment variables. With the constant ebb and flow of chemical and dyeing evolutions, it is simply impossible to duplicate every scenario in our lab that could come up in the real world.
This is why I refer to this industry as an art form. Only a professional with years of experience can draw on their “trial by fire” education that enables them to keep the production flow going with minimal downtime and loss. Again, as much as we would like it to be, most of our industry processes are not simply “set-it-and-forget-it” type steps.
Quality Control Checkpoint
With proper curing, puff ink can add so much depth to print pieces. Photo courtesy of International Coatings
Every single garment or substrate that falls off the end of the dryer is the printer’s responsibility. No one is going to hold your hand and make sure you did it correctly. The right color, the right garment, the right placement, the right design, etc., all require your attention. Put together a quality-control checklist and go through it for every order: Once after you print the first production sample; once midway through production; and once when the job is completed.
Here are a few suggestions for what your checklist could include:
Is the garment going to bleed or possibly ghost? When in doubt, test the fabric. Is the correct type of ink being used? Did you correctly spell the customers’ company name? Is the garment being printed the one the customer ordered/provided? Is it the correct color and size? Does the image go on the front, the back or on the sleeve? Do they have a PMS color callout?
There are so many things going on, but one of the simplest and easiest things to check at the end of the line is whether the ink is cured. The cool thing about plastisol is that if you catch the job before it goes out the door to the customer, you can re-run the garments through the dryer, either slower and/or by raising the cure temperature of the dryer once again. You probably could save the job that way—instant hero status!
Kieth Stevens is the Western regional sales manager for International Coatings. He has been screen printing for more than 42 years and teaching screen printing for more than 12 years. He is a regular contributor to International Coatings’ blogs; and won SGIA’s 2014 Golden Image Award. He can be reached at [email protected]. For more information, visit iccink.com. You can also follow the company’s blog at internationalcoatingsblog.com.


