As discussed in the first part of this two-part series, in which we focused on flash units and dryers, when it comes to screen printing, the press is only part of the equation. Equally important are the ancillary units that are also involved, to a degree where, as previously stated by Alex Sroka of Anatol Equipment, “There’s really no such thing as ‘ancillary’ equipment…everything is equally essential to achieving high-quality results.”
With that in mind, this time around we’ll be looking another couple of pieces of equipment that may not be quite as close to the center of action as flash units and dryers, but are no less important: screen exposure units/computer-to-screen-systems and washout booths. For an overview of the ins and outs of choosing the right press, click here.
Screen-Printing Screen Exposure Units
In Part 1 of this series, we focused on those systems that are intended to cure or gel the ink during or after printing. Before any of this can happen, though, decorators need to create the necessary screens. Historically, this has meant employing an exposure unit to selectively develop the emulsion, creating a sharp, clean edge to the design when an operator rinses away the soft, uncured emulsion in a washout booth.
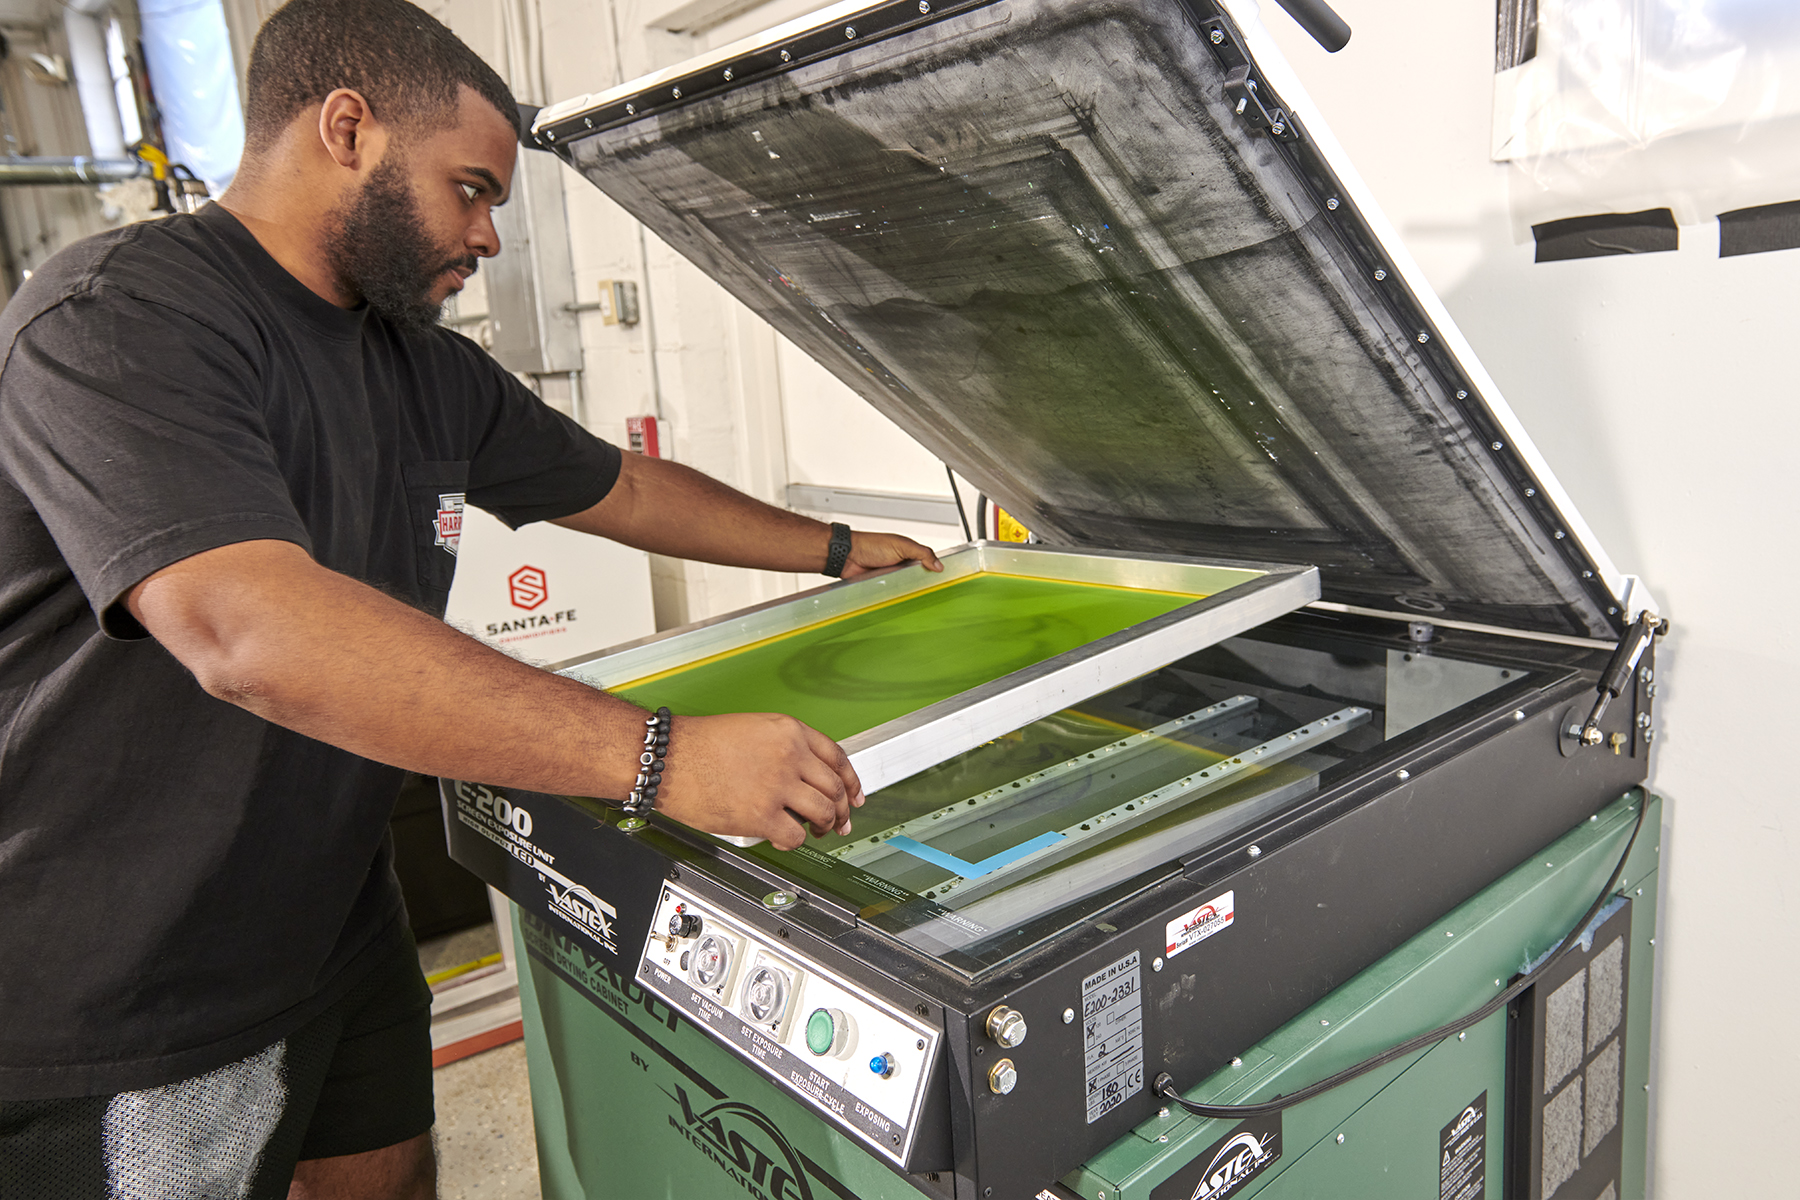
An LED-powered decorated apparel screen-printing exposure unit from Anatol. Photo courtesy of Anatol
As was the case with exposure units and dryers, a number of different choices are available, both in terms of the kind of light employed and the mechanism used to secure the screen as it is being developed.

With respect to lighting, screen printers once had to choose between metal halide bulbs or fluorescent tubes. However, both approaches have their downsides. Specifically, the metal halide approach is expensive and consumes an inordinate amount of energy, while fluorescent systems tend to be inefficient and become progressively less powerful with use.
Enter today’s LEDs, which not only require a fraction of the energy to operate but provide years of service without showing any kind of wear. As an added benefit, today’s LEDs are also carefully configured to maximize their UV output—UV radiation being the key to effective curing.
“The majority of exposure units have gone LED since they have all of the benefits of metal halide without any of the drawbacks such as high energy usage and expensive bulbs that need to be replaced frequently,” says Mark Vasilantone, president of Vastex International. Vasilantone adds his own company has now “moved entirely away from fluorescent and only offers LED.”
In terms of the mechanisms employed to secure the screen during actual exposure, you have the choice of going with either a vacuum system—in which a combination frame and flexible airtight cover are used to “suck” the coated screen up against the film positive—or the compression approach, employing a padded, fitted weight, or a combination of a fitted piece of foam and a properly sized cover, as often as not weighted down with one or more ink buckets.
Not surprisingly, the vacuum option is the more expensive of the two. However, the consistent contact it applies is ideal for creating fine print lines or halftones. In fact, when doing half-tone work, in particular, a vacuum unit is pretty much mandatory. The downside to going with a vacuum unit, unless using a larger vacuum generator as well, according to Vasilantone is having to wait for the system to achieve a tight seal. For precision work, though, it’s worth it.
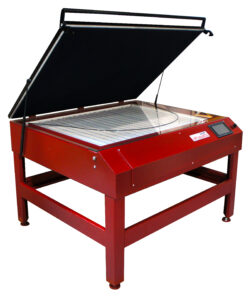
Note the robust construction of the LED exposure unit from Workhorse Products. Photo courtesy of Workhorse Products
Compression units, on the other hand, being incapable of applying the same degree of even pressure will allow a certain amount of light to creep in around the edges, which is fine for more basic designs, but can become problematic in the event you’re trying to print an image with a lot of detail. That said, being the more affordable option, compression units can be great for smaller shops and decorators just starting out.
Per Anatol Equipment’s Sroka: “Vacuum exposure units do a better job ensuring tight contact between the screen, the film positive and the glass. This is essential for getting crisp, sharp edges on your stencils. The more detailed your prints, the more important tight contact becomes. Compression units can be a little less expensive up front, but you run a greater risk of undercutting and other issues.”
Beyond that, other features to look for include an integrated timer (an important feature given the importance of exposure time to the creation of quality screens, especially in larger shops with high production capacities) and add-ons, like gas shocks to hold the vacuum unit frame up and out of the way when inserting and removing the film and screen.
Also important to consider is the size of the exposure unit you install in your shop, especially if you plan on using larger screens. “Screens used on an automatic press are often larger in size, and because of this the size of your exposure unit is also a factor to consider,” says Workhorse Products president, Tyler Dummett. “With larger screens, you also need a larger unit to ensure consistent and even exposures across the entire screen. In addition to the size, the power of the unit is important. You may need faster burn times because of faster production times.”
“Size definitely matters,” Sroka says. “Consider your future needs, not only your current needs. If you’re using 20-inch-by-24-inch screens on a manual press now, but thinking about going auto with larger screens, make sure your exposure unit will be able to accommodate both.”
Decorated apparel and computer- or direct-to-screen
Taking things up a level with respect to efficiency, technological sophistication and, of course, cost, there’s the option of going with a computer-to-screen (CTS), direct-to-screen (DTS) or laser-to-screen (LTS) system. (Note: the terms CTS and DTS are often used interchangeably, though they’ll be differentiated in this article.) The idea here is to forego the use of films either by 1) using a computer to print a positive image onto a coated screen (CTS), which is then exposed
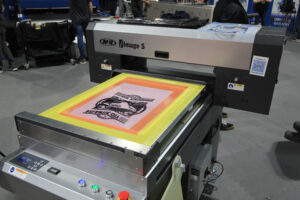
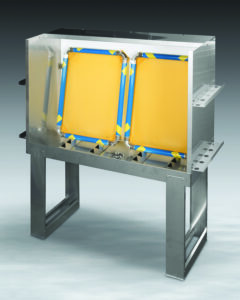
M&R’s i-Image CTS imager speeds up screen-production by eliminating the need for film and enabling much easier registration. Photo courtesy of Impressions Expo
and processed in a washout booth or 2) employing a computer guided laser (DTS or LTS) to burn the negative image onto a prepared/coated screen, forgoing the need for an exposure unit completely.
In either case, the system will employ a digitally controlled gantry to position a laser or print head over the surface of the screen being processed. With respect to CTS, there are two different types of systems available: those employing ink and those employing wax. Among the advantages of an ink-based system are the fact the systems generally cost less and work more quickly—more printheads generally equating to faster processing times. Wax, on the other hand, dries faster and provides an especially sharp image. Granted, you’re going to get a nice sharp image using either approach. However, if your business calls for frequent use of fine lines or half-tones, wax may be the way to go.
Because the material being applied solidifies so quickly, it can also be applied to screens oriented vertically, which in turn means wax-based systems typically have smaller footprint, a boon for shops with limited space. Examples of this approach include the Spyder II and Spyder III systems manufactured by Exile Technologies.
Ink-based CTS systems, on the other hand, require the screens to be placed horizontally during processing. If space (and your budget) allows, an especially convenient approach can be going with a CTS system that integrates both the printing and exposing phases. Examples include the M&R i-Image STE I Computer-to-Screen (CTS) Imaging-Exposure System and large-format i-Image K and KX Computer-to-Screen (CTS) Imaging and Imaging-Exposure Systems.
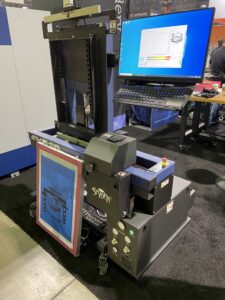
The vertical orientation of the Syder II, which employs wax to create its images, allows it to occupy a much smaller footprint—a plus for crowded shops. Photo courtesy of Impressions Expo
Whether you go with ink or wax, expect to make big gains in terms of both labor and material costs, due to the reduction in the number of steps involved and the ability to forego the use of film. Because you are no longer dealing with films and film placement, registration problems also go away. The reason for this is the way the coated screens are all fixtured identically during printing, which results in their automatically being in-register as well, making press setup that much easier—a huge time saver.
Not content merely doing away with films? Then you may want to consider a direct-to-screen or laser-to-screen system, in which a gantry-controlled laser both prints and cures the emulsion on a coated screen, after which it can be taken directly to the washout booth—no separate exposure necessary. Similar to waxed-based CTS, screens can be oriented vertically, as is the case with, say, the LTS8012 Direct Laser Image Exposure Unit system from Saati.
On the downside, laser-based systems are the most expensive option of the three. However, in addition to being a time saver they offer the advantage of employing minimal consumables, since there’s no longer a need for any kind of wax and ink. Another big advantage to employing lasers, as opposed to a wax or ink printhead (or printheads), is avoiding the maintenance issues printheads and their associated components entail. As is the case with CTS, with a DTS or LTS system registration and press setup become non-issue thanks the precise fixturing involved.
Screen Printing Washout Booths
Which brings us to washout booths, a piece of equipment that for beginners may seem a luxury, but is simply a fact of life for anyone looking to take their business to the next level. Tales abound of big-time operators starting out spraying and reclaiming their screens in all manner of receptacles—from bathtubs to, literally, the kitchen sink. The internet is also replete with do-it-yourself washout booth hacks for those looking to avoid the cost of a professionally configured system.
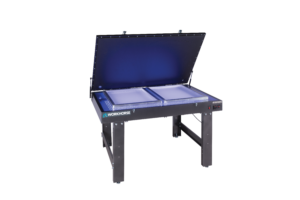
Note the sturdy construction, screen racks and translucent back panel on the Vastex washout booth. Photo courtesy of Vastex
The problem with this kind of minimalist approach, though, is it comes with costs of its own in the form of challenging ergonomics and compromised quality. No one likes rinsing or reclaiming screens. It therefore pays to make the job as efficient as possible. At the end of the day, for a growing business, taking care of the bottom-line means taking care of workers as well.
First and foremost, when it comes to speccing a washout booth you need to consider size. If your shop has all the room in the world, great. If not your company’s washout area will undoubtedly end up being tucked in some closet or corner, and you’re going to want to make sure there’s room. That said, the bigger the better. This is another case where size matters, especially if you want to be able to process multiple screens. The good news is that any number of models are available configured specifically to fit in tight spaces.
Plastic (including models made from recycled materials, like polyethylene) and metal stations are available, some assembly required in either case. Plastic components aren’t as strong as those made of, say, stainless steel, but at the same time you’ll never have to worry about corrosion. Beyond that, features to consider are an integrated frame (or frames) holder (or holders) to keep your screens secure; a pressure-wash wand mount; splash plates lining the top, front and sides of the booth; a sturdy support structure; and LED backlighting, or at the very least a translucent back behind which a light source can be placed. The latter is crucial for being able to examine the screens being processed to ensure there are neither any areas that still need to be rinsed, nor holes.
Other things to keep in mind are filtering systems, especially for those companies operating in areas with strict environmental laws. Many of those same companies offering washout booths offer both this kind of equipment and back-panel lighting gear, as well.
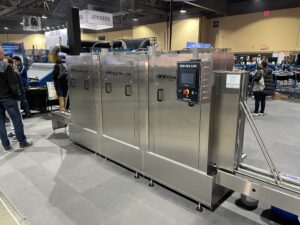
Automatic rinsing and reclaiming systems like this M&R Eco-Tex unit, are ideal for streamlining screen processing at larger shops with higher-production capacities. Photo by Adam Cort
Fully automatic systems are also available. These are likely aspirational for many if not most readers, those shops in the market for these kinds of systems already tending to be well established. However, it’s good to know these kinds of systems are out there. Examples include the M&R Eco-Rinse automatic screen rinsing and Exo-Tex, Eco-Tex Modular and Eco-Tex Lite automatic screen cleaning and reclaiming systems; Bluewater Labs line of inline reclaiming and high-pressure cleaning machines; and the Ajax In-Line and Ajax Wash & Go screen reclaimers from Lawson.
Note, among the automated reclaim and rinse systems currently on the market, a number employ “dip tanks,” in which a screen, or screens, can soak in a chemical mix to help loosen the emulsion prior to actual spraying—an approach that can be used to facilitate the reclaiming process with manual systems as well.
Ed Note: To see Part 1 of this two-part series on screen-printing accessory systems, including flash units and conveyor dryers, click here. For an overview of the ins and outs of choosing the right press, click here.


