A look at some of the tools every professional apparel decorator needs to run an efficient, profitable custom embroidery business
When I first stepped into the arena of machine embroidery, I thought all I would be doing was left chest logos and caps to serve the existing customer base I already served with signs, decals and screen-printed apparel. I soon realized, though, that I was going to need more than the traditional tubular hoops that came with my embroidery machine if I was going to do the job efficiently and with the consistent results my customers had come to expect. What follows is a list of some of the tools and tricks I discovered to help make this happen.
Magnetic Embroidery Hoops, aka ‘Mighty Hoops’
One of the very first things I acquired to make my life easier was a small collection of magnetic Mighty Hoops. For those of you who aren’t familiar with Mighty Hoops, let me introduce you to these amazing gadgets that, in my experience, at least, no embroidery shop is willing to give up once they’ve gotten their hands on them.
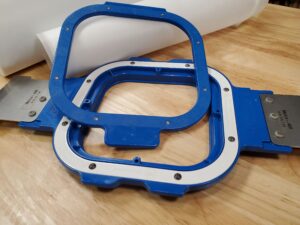
Go Blue! Mighty Hoops are a great investment, no matter the kind of embroidery your shop specializes in. Photo by Katie Wubben
Mighty Hoops are a brand of magnetic hoop manufactured by HoopMaster/Midwest Products, Inc. in Germantown, Wisconsin, that sets your hooping tension automatically and have a very strong hold making it possible to get the thickest and toughest projects completed with ease. In addition to being amazing for your shop’s more run-of-the-mill projects, Mighty Hoops really earn their keep when decorating fleece zip-ups, canvas jackets, quilted or sherpa lined sweatshirts, blankets, bags of all kinds and towels. When used correctly, you’ll never have one of these hoops pop apart during stitch out.
One thing: Be careful when purchasing your magnetic hoops to make sure they aren’t copycats manufactured abroad. Real Mighty Hoops are blue or white in color and made in the U.S.A. I’ve heard of cases where people who purchased a set of knockoffs were disappointed with the results as they do not work nearly as well. If this sounds like a sales pitch, so be it. Mighty Hoops are that good.

When ordering your Mighty Hoops, it is critical that you choose sizes that are compatible with your specific machine and also have the right brackets. Not all hoop sizes work on all machine types. Also, if you are in the market for a new embroidery machine, be sure and purchase one that allows you to use these amazing hoops. I teach classes all over the country, and in rooms of 50-100 people not a single person who has these hoops says they would be willing to give them up for anything!
Machine Embroidery Hooping Stations
Hooping stations, such as the All in 1 Hooper, another great U.S.-manufactured accessory from TEX Inc. and HoopMaster hooping systems from the same folks who make Mighty Hoops, assist during the hooping process by placing the hoop in the same spot and aligning the shirt quickly and consistently using the markings on the hooping station.
In addition to making repeat orders that much easier to produce, a hooping station will help speed up the hooping process, regardless of the hoop style being used. It will also aid in the alignment of the hoop with the garment and help keep the backing in place, ensuring it goes edge to edge every time with the right tension. Believe it or not, ensuring your backing is hooped perfectly will eliminate many common production issues, such as thread breaks, false thread breaks, design distortion, registration issues and puckers. When I paired a HoopMaster hooping station with my Mighty Hoops, it took my employees one time to hoop the garment perfectly rather than three, simply by keeping the hoop correctly positioned on the garment while also keeping the backing where it needed to be.
When purchasing a hooping station from HoopMaster, it is best to work directly with a salesperson to make sure you get all of the pieces you need to work with whatever hoops you plan to use, be they for hooping infant-wear or all the way up to plus sizes for adults. As for the All in 1 Hooper, it can handle garments of all sizes with the five boards built within one hooping station making it possible to hoop infant, toddler, junior, adult sizes and sleeves. The only time anything in addition to the All in 1 Hooper will be needed is when it will be used with a magnetic hoop. In that case, you will also need a magnetic hoop bracket. The system is well designed to work with hoops of any shape as well as any machine type and is more compact than having multiple different sizes of hooping stations.
Note: if your work area does not have the space for a hooping station or you’re on a tight budget, you can certainly get by without one; however, if you’re already using Mighty Hoops, the company also offers a backing holder for each hoop size. This is a new accessory HoopMaster has come up with to replace tape and other methods of keeping backing where it belongs.
Machine Embroidery Cap Frames and Clamp Systems
While on the topic of hoops, if you find yourself doing a lot of caps, you may want to consider some back-of-cap hoops and/or a clamp system to allow for sewing on the side and back easily. Many machines come with a wide-angle cap frame that allows a design to be placed on any area of the front as well as the sides. The trick then to using this approach is hooping perfectly and consistently, especially with a multi-head machine, in order to be sure your design(s) land right where you want them.
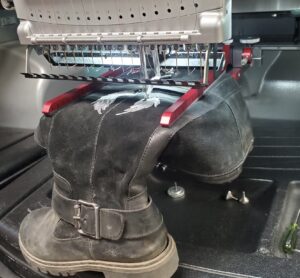
When the going gets tough, clamping systems get going. It would be hard to imagine a tougher job than this one! Photo by Katie Wubben
If there are names on the side of the cap, I personally like to run these on a clamp system because of how quick and easy it is to align the various widths of names to the cap panel I want it placed on. If, on the other hand, I’m using a wide-angle cap frame, I may opt to do the fronts of caps first, then sew the names as a separate design. This allows me to trace the front and know exactly where that design is going to land. I then trace the name as a second design allowing me to see that it lands exactly where it needs to as well. To sew both the front design and the name on the side of the cap all in one fell swoop, it must be hooped perfectly AND the design must be set up to place the logo and name in the exact right spot. This can be quite challenging due to names all having a different width.
Clamp systems also allow odd projects and items, like shoes, belts and pockets to be embroidered. However, before purchasing a clamp system, I recommend customers think seriously about how much they’re going to actually need it, as they can be quite an investment. That said, depending on the type of business you’re doing they can be worth their weight in gold. I learned very quickly, for example, that if I wanted to market my embroidery services to personalize things like horse harnesses, belts or other thick and odd items, a clamp system was going to be a requirement.
If a clamp system seems like something you need in your business, check with the machine manufacturer to see if they have their own specific model for use with their machine. If not, look into the Slim Line clamp system from HoopTech, a well-made system that is compatible with multiple machine brands. If you’re looking to add or replace an embroidery machine, be sure and consider whether a clamp system is available as an option in the case you someday want to use one.
Machine Embroidery Accessories: Bobbin Cases
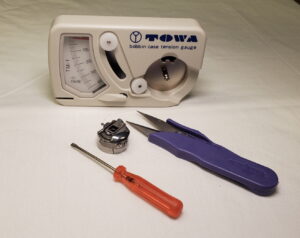
Now that we’ve explored hooping options and other fixturing aids, let’s move on to some of the other items and tools you may want to consider in order to keep your embroidery business running efficiently. In my own shop, as soon as I started seeing a fair amount of volume, I purchased an extra bobbin case per head so that at the same time a machine is running I could have a pre-wound and tension-tested bobbin ready to be popped in as soon as the first one ran out. I would then clean, rethread and tension test the empty bobbin while the machine was running with the one just installed.
Granted, it may not seem like this would save much time, but every minute adds up. Keeping a bobbin tension gauge near all of your bobbin cleaning tools can also help speed up the process while helping reduce downtime caused by bobbins not performing optimally. Personally, I prefer Magna-Glide bobbins, manufactured by Fil-tec right here in the U.S., because of the way they hold their tension from start to finish, eliminating the need to adjust bobbin tension during a sew out. Having to do so can be especially irritating on projects that need to be removed from the machine to access the bobbin.
Machine Embroidery Accessories: Storage Systems and Snips
Next, let’s discuss how storing your threads, needles, backings and hoops in an efficient manner can help complete projects more quickly. Like a well-organized kitchen, an embroidery production area will operate that much more smoothly when things like bobbins are kept near the machine for quick replacements and backing is kept near the hooping area in order to cut down on the amount of time spent walking to and from your storage cabinet. Keeping snips, screwdrivers, needles and a machine oiler by each head in a magnetic locker organizer will help save time as well.
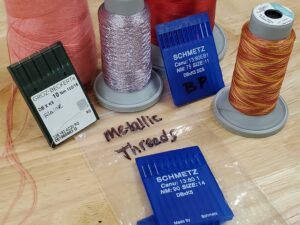
Meet the challenge of working with specialty threads by having the requisite information for using them close at hand. Photo by Katie Wubben
I store my threads on a grid of wall pegs with the thread number on each peg. This allows me to place each thread in the same place whenever it isn’t on a machine. As an added benefit, at a glance I can see which threads need to be restocked when ordering and can quickly identify if I already have a particular thread on a machine. I also keep a thread card in my design and retail areas in order to make choosing the colors for use with each project quick and easy. On these thread cards I highlight the colors we keep in stock as well to eliminate having to run back to the production area to see what we have on hand. Regardless of how you decide to store your threads, keep them away from direct sunlight and heat vents, while also protecting them from any odors and dust.
If you find yourself using specialty threads (metallics, thick cottons, thin polyesters) and need to change out needle sizes and/or tensions whenever you do so, here are some tricks to keep you moving quickly. First and foremost, store the appropriate needle size with each specialty thread, so you don’t have to try and remember which one goes with what. You can also include a little “love note” to yourself that specifies any special settings (machine tension, speed or special threading technique) for that thread. Finally, be sure and use a top tension gauge to set your tensions properly and quickly if necessary and then get them back where they belong when you’re finished. A good tension gauge allows you to aim for a specific value that is easy to replicate, taking much of the frustration out of these amazing threads.
I’ve also found keeping a snips and sharp shears for trimming backing in my packing and shipping zone is handy. No matter how much I look over a garment, it never fails: once I’ve moved on to the shipping portion of the job I will notice at least one little thing that needs to be tidied up. I therefore keep shears and snips along with some liquid stitch (glue for sewing projects) to make any last-minute fixes on the project and ensure it is of the highest quality possible. Keeping all packaging options, packing supplies and thank you notes in this same area also helps reduce downtime.
Commercial Machine Embroidery: Miscellaneous Accessories
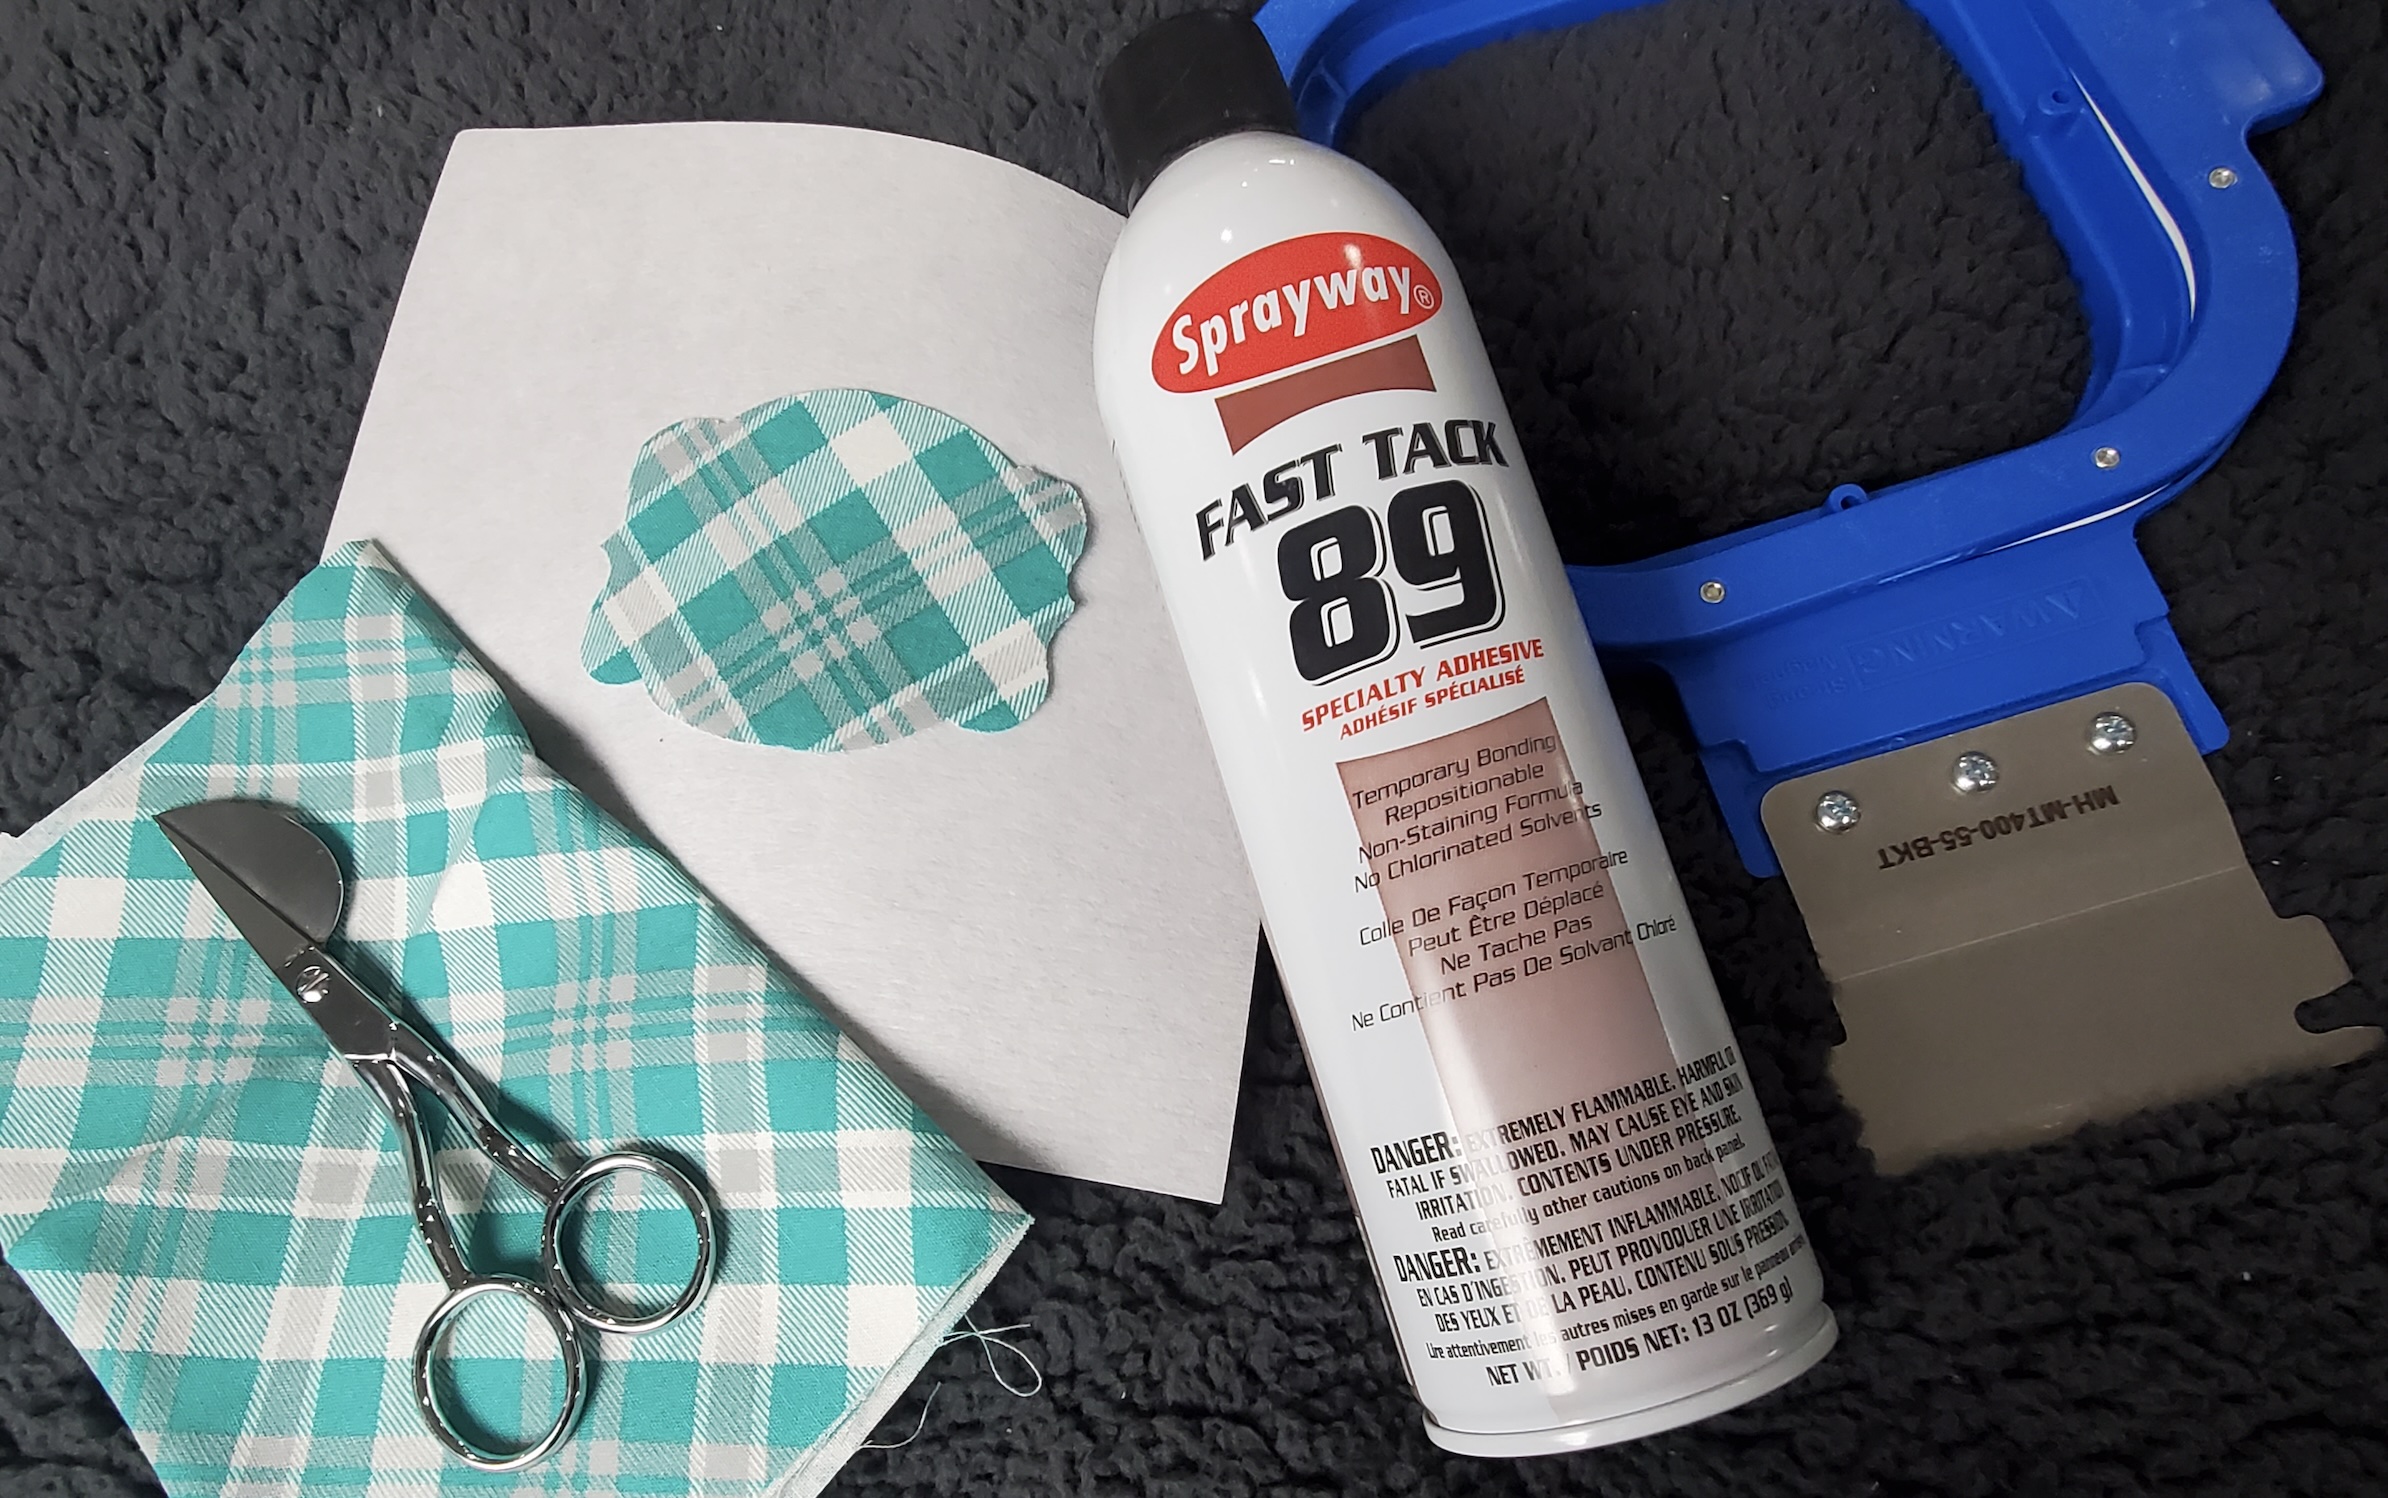
Different projects often require different approaches to achieve quality results. I have muffin tins and a cake pan in my kitchen, because similar ingredients can be turned into different baked goods. Same thing with embroidery. Our backing, threads and designs can be turned into lots of different creations, including everything from free-standing lace to in-the-hoop projects, left chest logos on polo shirts, stocking caps, patches and more. The best way to be prepared for as many project types as possible when starting out is to have a variety of backing types and weights as well as needle sizes and types. Examples include 80/12 needles for puff embroidery, adhesive spray for in-the-hoop projects and wash-away mesh backing for free-standing lace. You may also want to have some appliqué scissors on hand for appliqué or tiny curved snips and a thread picker for fringe embroidery.
Whether it’s a top-quality tension gauge, snips, an extra bobbin case or the right-size screwdriver, don’t skimp when it comes to making sure you have the necessary tools and accessories—you’ll be glad you didn’t when you need them! Photo by Katie Wubben
When considering taking a stab at a unique project or technique, look for tutorials to guide you through the process. When I create my own tutorials, I not only provide step-by-step video instructions, but a supplies-and-tools list as well to make sure it’s understood what will be needed to complete the project. Few things are as frustrating as starting a project only to get halfway into it and realize you don’t have the proper supplies to see it through to the finish line. Attending shows and taking classes to learn specific techniques is another way to advance your skillset and know what you need before you try and apply an all-new technique.
Beyond that, some of the random tools I couldn’t get by without are my needle point oiler, LED magnified seam ripper and a small magnet that helps me achieve perfect needle orientation every time. Other handy things I’ve come across over the years are canned air for cleaning away lint, a “snake light” or headlamp, steamer, tiny iron and my noise-cancelling ear buds, which I can use to stream music while running a machine, or machines, and still hear people coming into my store.
Finally, when I’m training those new to embroidery, I make a point of providing them with personalized cheat sheets or checklists to help them maintain efficiency and avoid becoming overwhelmed by the process. From what needle to use with a particular thread type to which density value to set for various design techniques, cheat sheets can be incredibly helpful when learning the ins and outs of embroidery. I highly recommend making a cheat sheet or two for yourself as well.
Katie Wubben is the owner of Trouble Me Knot Embroidery, an embroidery training company and distributor of a wide range of embroidery supplies, including everything from needles to bobbins, backings and, yes, thread and HoopMaster products. Wubben also sells Melco and SWF embroidery machines and is a veteran presenter with the Impressions Expo’s educational conference program as well as a number of other shows around the United States. For more information, go to troublemeknot.com.
[This article was updated May 18, 2026]


