I have been consulting with screen printers for more than 40 years. During that time, I have found that many screen printers make the same mistakes for a variety of reasons, the most common one being “not knowing,” that or thinking they can do it better and faster their own way.
Many of the “mistakes” come from the art and screen departments. The ones from the art department are usually based on what the artist learned in school. The problem is software programs are typically taught with an eye toward offset printing, not screen printing. Artists therefore have to learn to modify their software so it will be compatible with screen printing. Since this isn’t what they were taught, mistakes happen.
In the screen department, most mistakes are made due to a lack of training. Someone is put into the screen department to clean screens. While there, they are shown how to reclaim a screen. Eventually they are shown how to coat a screen, and finally, they are shown how to expose and then wash it out. What they are not taught is the reason for doing things in a particular way. Because of this, mistakes are made in the screen room that affect quality and productivity further down the line.
What follows is a list of some common mistakes I’ve found myself running into over the years.

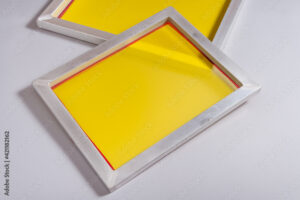
Different mesh colors and counts require different exposure times. One time does not fit all. Photo by mdbildes – stock.adobe.com
Registration Marks (Three-point registration system): I’m not sure how many shops I have worked with that either don’t use registration marks or use less than the three that would make it easier and faster to register a job. Not only the art department doesn’t include them in each separation, when they do, the person setting up the job tapes them out prior to printing them. The reason they do this is to make sure the ink doesn’t leak out from the screens. However, it’s just as easy to tape out the registration marks after the design is registered.
The reasons for having three registration marks are accuracy and speed. It’s also a good idea to make your own registration marks so they are a size that is easy to work with when setting up a job. Don’t skip this step!
Registration Template: The purpose of a registration template is to facilitate design placement and ensure your press operators have all of the information they need to correctly set up a job and be able to document some of the information about the job.
The information that needs to be entered in a template includes:
- three registration marks (two on top, one at the bottom)
- a calibration bar
- ink colors
- mesh counts
- customer name
- design number
- color order
- print location
Bottom line: don’t leave your operators guessing. The result will invariably be mistakes and poor-quality prints.
Documentation: Ensuring a design looks good the first time you print it is important. The real test, though, comes when you have to set up and print the same design again—and again and again—and have it look exactly the same as the first time you printed it. In order to do this, it’s critical you have all the information recorded on how the job was set up.
Some of that information is available from the registration template. What is missing, though, are the even finer details of the print, including:
- ink brand
- ink series
- ink color or PMS color
- flash specifications
- mesh count and thread diameter
- emulsion
- coating technique
- highlight and shadow held on the calibration bar
Beyond that, when working with an automatic press you’re also going to need the following:
- floodbar speed
- floodbar pressure
- floodbar type
- squeegee pressure
- squeegee speed
- squeegee angle/type
- squeegee durometer
- number of print strokes
- press used
- dryer speed/temperature
- pallet temperature
- garment
- print location
- halftone information
With this information, it should be possible to duplicate a design and make the print look identical to the first print run.
Screen Exposure: More and more shops are using SBQ Polymer emulsions and LED exposing units. However, what I have been finding when questioning the exposure times my clients use is an answer that doesn’t make sense, i.e., one exposure time for all mesh counts.
Each mesh count and coating technique should have a specific exposure time. It’s not possible to expose 110 yellow mesh for the same time as 305 yellow mesh. Colored mesh takes twice as long to expose as white mesh, in which case 110 white could possibly be the same as 305 yellow, but not the same as the other mesh counts.
In addition, when using Diazo or Dual Exposing emulsions, an exposure calculator or 21 step gray scale should be used. With SBQ Polymer emulsions, however, a step wedge or 21 step gray scale should be used.
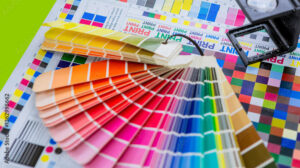
Be aware of the fact the PMS color system was originally created for printing on coated or uncoated paper—and apparel screen printers don’t print on paper! Photo by Shahriar – stock.adobe.com
Color Order: There are a few general rules that pertain to color orders. When using an underlay, for example, design from least coverage to most coverage and from darker colors to lighter ones. There are also decisions that need to be made in all designs based on the nature of the most important item in the design and making sure it is legible. Similarly, there are times when a second flash is necessary, so the design prints cleanly and quickly.
Pantone Color Matching: Almost every ink company has a color matching system, and many clients will want you to use a PMS color. If you go to the Pantone website, however, one of the things you’ll find is there are no “U” or “C” numbers associated with textiles. The reason for this is the “U” is for uncoated paper, and the “C” is for coated paper—and we don’t print on paper.
For screen printers to use the PMS system for color matching, the color when mixed will look like a “C” color in the container but once it is on the garment, it will look like a “U” color. That being the case, forgot about the “C” and “U” and check the formulas for the one that uses the least number of components and the least amount of fluorescence. If a formula has fluorescents and few components while another formula has no fluorescents but more components, use the one with no fluorescents. Fluorescent inks are very sticky and will create pickup problems. If you need to use a formula that has fluorescents, have that color at the end of the print or in front of a flash. This will make the job run smoother and will be production friendly.
Squeegee Marks: On dark garments, especially, printers have been trying to figure out how to get rid of the squeegee marks for what feels like forever. In doing so they have tried everything for backing off pressure to using smaller squeegees.
The marks appear because the fiber was forced down where the squeegee went over the garment. With this in mind, there is an easy way to get rid of the squeegee marks. Spray the edges of the compressed areas with spray starch. The spray starch will lift the fibers, and the marks will be gone. This can be done after the garment comes out of the dryer but doesn’t have to be done immediately. It can be done a week or two later and still get the desired results. Note: spray starch can also be used to get rid of hoop marks when embroidering.
Down Payments: Almost every shop I have worked with requires a down payment, which is a good idea. Where problems arise is in the amount required. Most shops require a 50-percent down payment, which may not even cover the cost of the goods required, i.e., ink and the garments being decorated. The down payment should never be less than the cost of goods plus something to cover at least a portion of the cost of production. Print shops aren’t banks. They don’t have a finance charge. Getting a proper down payment means that in the event things go sideways you’re not left holding the bag. While I’m on the subject of finances, you should also include an additional charge to offset the costs associated with credit card transactions.
Drying Cabinet: The first time I was introduced to a drying cabinet was when I was in London in the 1970s. I was there working with my largest client, and it was getting close to lunchtime. We had just coated some screens, and I assumed we would be leaving for a while since it took hours for my screens to dry back in my shop and it would be the same here. When I asked where we would be going, my client asked me if I didn’t want to shoot the screens before we left. I said it would be a long time before they were dry enough to shoot, to which he replied, they would be ready in about 15 minutes. I asked how that was possible, and he said he had a heated drying cabinet. When I got back to my shop, that was the first thing I built.
Today, you can purchase a drying cabinet or build one. Using a heated drying cabinet for degreased screens as well as coated ones will not only speed up the drying process but give you greater consistency in your exposures, since the relative humidity will be close to where the emulsion manufacturer recommends it should be. A hygrometer should also be kept with your screens in their storage area. If the relative humidity goes above the 40 percent range, the screen should be put into the drying cabinet for a few minutes to get rid of any excess moisture before they are exposed.
Cost of Production: When I opened my shop back in the 1970s, I never knew anything about what it cost to “put the key in the door,” so to speak. Today, I think most printers still don’t know.
In order to know if you are profitable or not, you will need to know how much it cost to open the door each day and then do what needs to be done to keep your business running. The items you have to consider are everything from salaries to taxes, utilities, rent, insurance, consumables such as ink, emulsion and everything else needed to run the shop. Once you know that, you’ll know if your pricing is in tune with making a profit.
Heat Guns: The best way to determine if you are getting enough heat when your garments go through the dryer is using an Atkins Heat probe. The problem for small shops is the cost of one, which is about $400.00. Instead of getting one, a heat gun can also be used. If you are going to use a heat gun, it should not be operated by hand. Instead, it should be placed against the exit side of the dryer and then shot down as the garment exits. This will ensure consistency. Whatever the reading, the internal temperature will be considerably higher. Although you may not know what the internal temperature is, you’ll know if it was high enough to cure the ink if the exit temperature is not too much lower than the desired temperature.
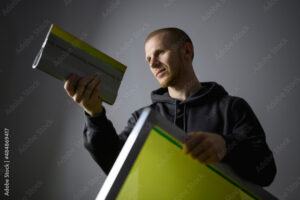
There are a variety of different squeegees available to today’s screen printers, but they all have one thing in common: they should always be sharp! Photo by Dmytro Hai – stock.adobe.com
Dull Squeegee Blades: It really is incredible how little many screen printers know about squeegees. There are many different types of squeegees, but all have one thing in common: they should always be sharp. A sharp squeegee will shear the ink, laying down a controlled deposit that is sharp and smooth, while a dull blade will lay down a lot of ink but not produce a sharp smooth print. Most printers have no idea how often they should sharpen the blades, nor do they have a squeegee sharpener. The companies that make squeegees recommend sharpening them every 10,000 prints. For a manual shop, that could take a very long time. For an automatic shop, though, that could be every week or two.
What I hear often is, “I’ll just replace the blade when it gets dull.” Great, I’d love to sell you a bunch of new blades every few weeks! Although a squeegee sharpener can cost thousands of dollars, by owning one, you can save thousands of dollars, since a sharp blade will allow you to not only print a little faster but improve the quality of the prints. That said, I would not recommend purchasing one if you’re a manual shop.
Registration Tape: I have watched all too many screen printers print way more garments trying to set up a job than the job calls for. They will print the base color, flash it and then register the next color and print it. If the print is off, they will micro-register the second color, print the base again, flash it and print again. If the registration is good, they will go on to the next color. If that one is off, they will print again starting from the first color, then the second color and finally the third color which they micro-registered. This gets repeated until all the colors are registered, which not only takes time, but requires a number of garments.
An easier and better way of registering a design would be to use registration tape. To begin, the base color gets printed and may or may not get flashed. The registration tape is then pulled over the print and the second color is printed on top of the registration tape. If the registration is off, the registration sheet is wiped clean with a dry rag, the screen is micro-registered and printed again. This is repeated until all the colors are in register. This process not only requires just one garment, it saves time and effort as well.
Veteran decorator and screen-printing guru Charlie Taublieb is both the principal of Taublieb Consulting and a regular Impressions Expo conference program presenter. He is also the author of the book, “The Screen Printers Handbook & Survival Guide,” available digitally or in print form at taubliebconsulting.com.


