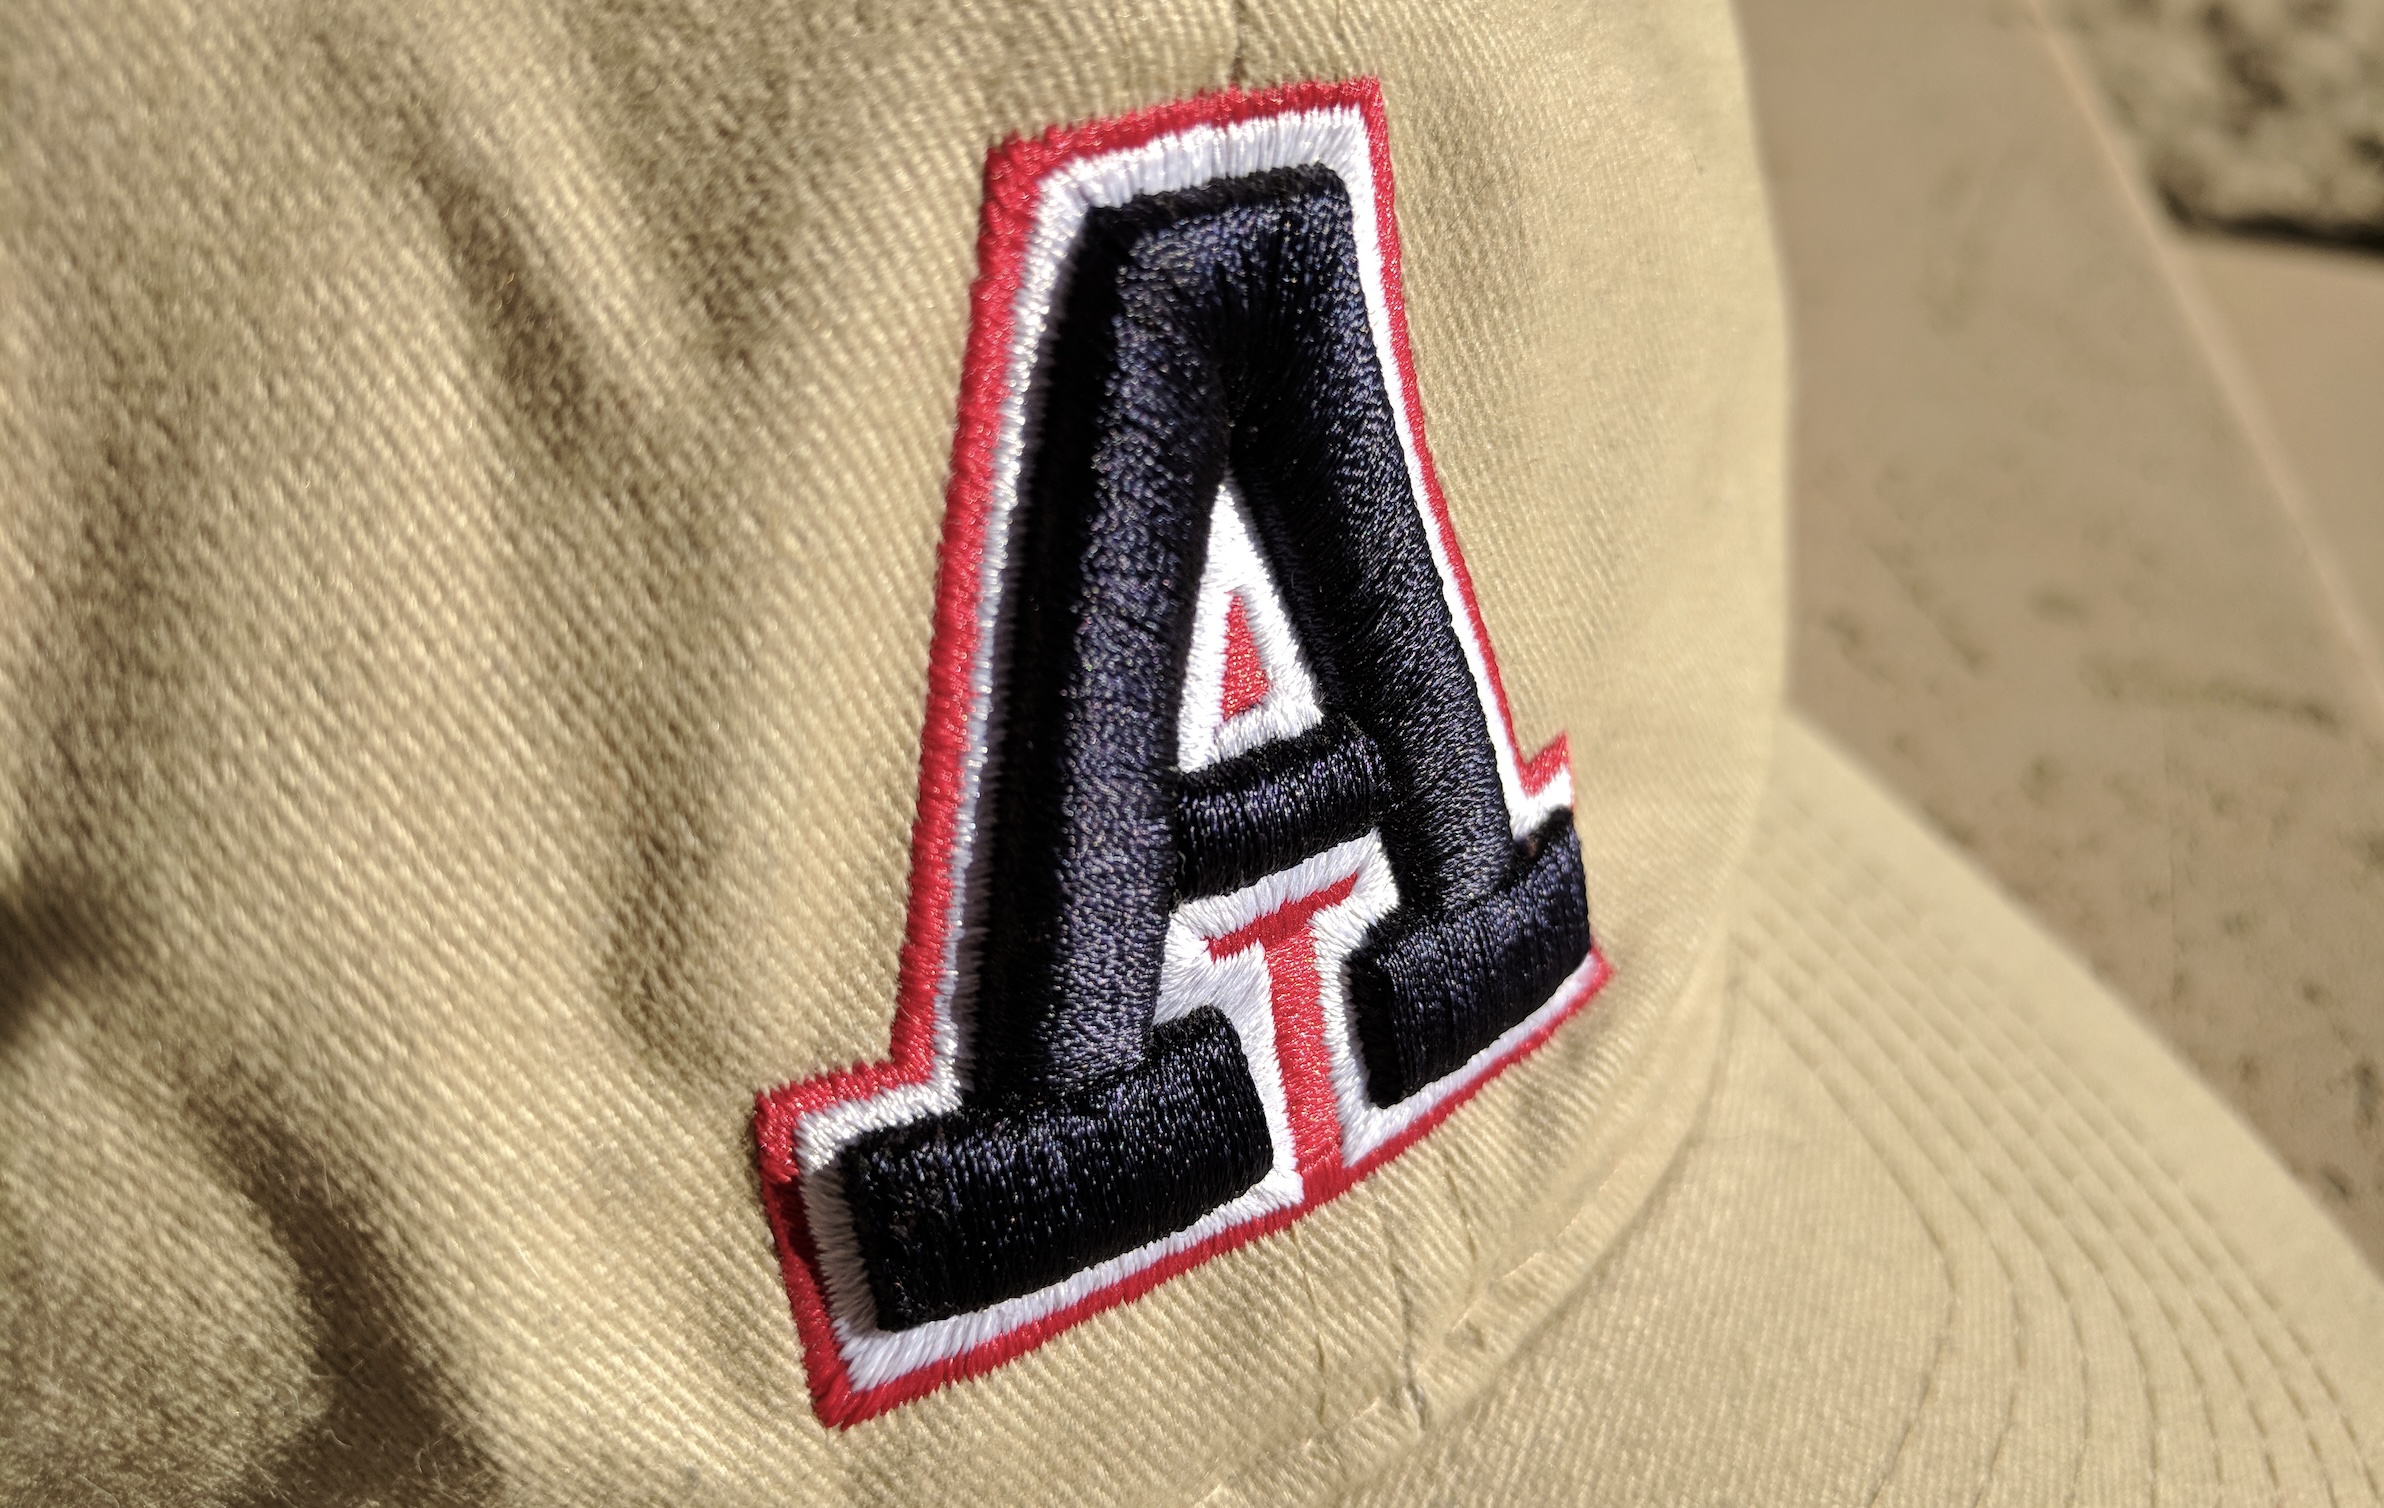
Though it may seem daunting, there’s no better way to take your commercial custom embroidery work to the next level, both literally and figuratively
When customers want noticeably bold embroideries, it’s hard to ignore the multidimensional impact of 3D foam. Once relegated almost exclusively to large letters in smooth satin stitches layered over flat-satin borders, today’s 3D foam designs include interesting surface textures, multilayer beveled constructions and even entire logos.
Better still, though they may seem daunting, the fundamentals of foam have largely stayed the same since their inception. Beginning with an understanding of what it takes to successfully design, digitize and execute classic foam designs, we can therefore expand from these fundamentals to create the eye-catching treatments customers crave.
Designing for 3D Foam Embroider
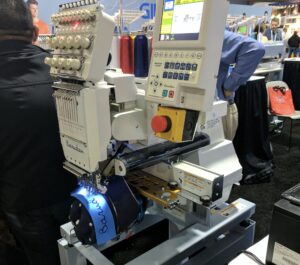
Today’s increasingly powerful embroidery machines are helping bring the use of 3D foam to an ever-increasing number of custom apparel decorating professionals. Photo by Erich Campbell
As much as anything else in embroidery, 3D-foam designs require a holistic approach, meaning we have to be mindful of and prepare for it from the design stage through digitizing and into execution. If you don’t design for foam’s strengths, digitize for its needs or use the right materials and methods, your 3D designs may literally fall flat.
Designing for Foam: Let’s face it, foam is not for fine detail. True, you can successfully use foam on relatively fine lines; however, the smaller the satin-stitch strokes or the finer detail you try to capture in foam, the flatter the design will be. The biggest, boldest designs tend to consist of wide, unbroken satin stitch columns, hence the “classic” letter designs that are still king in the foam world. That said, we can also combine and/or layer multiple satin columns into more complex designs, or use fills over foam as long as we remember the edge of the foam needs special treatment. When designing for foam, the best thing you can do is think bold.

Digitizing Basics: The primary considerations when digitizing for foam consist of creating the structures and settings necessary to form the cutting edges that perforate the foam. In other words, we need to digitize in a way that makes it possible for the excess foam to be easily torn away at the same time the topstitching stays in place. This in turn requires the “capping” of open column ends on satin stitches and using around twice the density we would typically use for standard flat embroidery. Note: when employing filled areas over foam, we won’t need this kind of density; however, we will still need a border to undercut the foam at the edges. No matter what we design, these edge elements need 1.5 to 2.0 point (0.15 to 0.20 mm) density stitching to cut cleanly. I typically start out using 1.8 points (0.18 mm) on my cutting edges.
Purpose-made 3D Embroidery Materials
Not all foam produces the same results. High-density embroidery-specific foams make it possible to achieve the look you want because they tear easily, remain thicker after stitching and provide a slightly sharper edge. By contrast, softer foams compress more and result in designs with a more rounded, lower crown. 3D foam is available in multiple colors and thicknesses, with some embroiderers stacking their foam to achieve thicker decorations.
Testing a known foam design with multiple thicknesses and types will let you build a material “palette” from which to select the best foam for a particular design or outcome. The goal is to use just enough thickness to arrive at the desired dimensions.
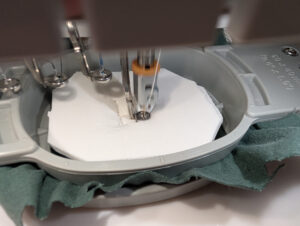
3D foam is available in multiple colors and thicknesses, with some embroiderers stacking their foam to achieve thicker designs. Photo by Erich Campbell
Extremely tall foams can “lean” or shift during running and can compress considerably, especially on machines where you can’t raise the presser foot. For most single-layer foam treatments, I employ the 0.30 to 0.40 mm thicknesses available in dense foams. For multilayer work, I usually use thinner foams, building no higher than 0.60 mm.
Foam typically requires a variety of special treatments to run at its best. Operators, for example, can secure the foam in multiple ways. These include taping a slightly oversized sheet of foam over the area to be embroidered or spraying a very light coat of embroidery-specific adhesive on the reverse side of the foam and carefully pressing it in place over the design area. Another option is using an elastic band or strap to hold the sheet in place, an approach that works especially for caps.
Additional adjustments at the machine can also help, though many embroiderers achieve fine results without much alteration. You may, for example, elect to reduce your thread tension, especially if your initial tests show too much compression. Some swear by certain needle types; however, I prefer to use the proper needle for the underlying garment rather than switching things around. The reason I do this is my results when I use foam have not differed much based on needle point geometry.
For those who have the ability to adjust their presser foot height, lifting the foot to the level of the foam’s surface can help avoid compression. That said, I have done most of my own foam work on unadjusted machines.
Finishing Strong in 3D Custom Machine Embroidery
In addition to the extra prep work, foam invariably requires some additional finishing as well. Though it may feel like you should be able to just stitch, pull away the excess, pick or tweeze out the few stuck bits in the centers of letters or loops and be done with it, there’s typically more to it than that if you want to get the best results.
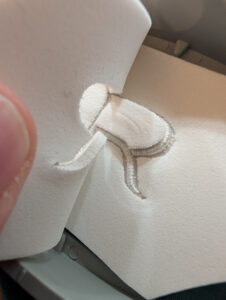
Being able to quickly and easily remove any and all excess foam after the stitch-out is critical to successful 3D puff embroidery. Photo by Erich Campbell
For the smoothest designs, you may need to bring the heat, i.e., carefully apply low, indirect heat to eliminate any remaining fibers. This will not remove large chunks of foam, but it will reduce any fuzziness at the same time it “tightens” the design. Take care with lighter-colored fabrics and threads, and be aware of the type of thread you’re using, as polyester can melt and lighter colors scorch if you apply too much heat or apply the heat for too long. The best tool to use for this kind of work is an adjustable heat gun, in order to dial in the amount of heat.
Bottom line, manual intervention is a must, as you’ll invariably need to poke the occasional bit of errant bit of foam back under the stitches you’ve made after tearing away excess. Though you will want something with a fairly fine point for this kind of thing, it should also be a blunt enough that it won’t damage the thread. If you find large chunks sticking out consistently in a particular area, consider using some additional specialty stitches and/or checking your stitch angles to correct the perforation and/or hold back the foam better. Often, just lightly rubbing the design with a piece of stabilizer or the back of your thumbnail can help spread out the thread in the event of show-throughs.
Deeper Digitizing—Settings and Structures for Successful Puff Embroidery
What follows are a few more tricks and techniques you may want to try to get your 3D foam designs just right.
Stitch Angles: Satin columns should ideally look tight and smooth, with stitch angles perpendicular to their edges. In addition, the incredibly high-density of foam stitching also requires gentle transitions into your curves and corners, due to the fact highly dense inner corners and curves can result in lumpy, textured surfaces at best and thread breaks at worst. Though you can try and use automated stitch shortening the texture will often still remain visible with lighter-colored threads, especially, in which case balancing the stitch angle transition is the better option. As you adjust your angles, avoid getting your stitches too oblique to the edge, as it can cause them to appear loose and loopy.
When bordering a 3D foam fill, it’s also best to avoid aligning the fill angle exactly to the satin column edges to avoid “splitting.” The reason for this is if the fill stitch is completely perpendicular to a covering satin, the border will pull apart the fill stitches beneath, revealing the foam. To avoid this, tilt the fill stitch angle slightly, around 10-12 degrees. If a problematic alignment is unavoidable, “feather” the inside of the satin border by 0.2 to 0.4mm and/or add a small zigzag underlay beneath the fill at the junction to provide color coverage.
Column Underlay: Though some digitizers swear by a “cutting run” of short-stitched edge underlay, the bulk of the poor outcomes I’ve diagnosed over the years have come from underlay falling off of cut foam edges and then popping out through the covering stitches. To avoid underlay and minimize foam compression from the presser foot or tight stitch tension, try using some long zig-zag stitches across your columns or some long (at least 0.4 mm) run stitches placed centrally under the object.
Fill Underlay: On fills over foam, a structural fill underlay can both tack the foam and provide additional coverage. Try a 0.4 mm, or roughly 40-point, density with a stitch length of 0.5 mm and an angle set perpendicular to the covering fill. As edges will usually be covered with a conventional wide satin border extending beyond the edges of the fill by around 0.8 mm, there will be no need for edge-run fill underlay.
Terminating Columns: There are two methods for cleanly finishing strokes, “capping” and “tapering.” If you taper, the beginning and end of the shape will taper to opposing corners, starting and ending the shape with a set of small, tight stitches and then broadening, ensuring the edges of the shape are on the full-density cutting edge. Tapering is often seen as easier to digitize and clean up than capping. Be aware, though, that it can also cause shape distortion and loose stitching due to the extreme stitch angles required to arrive at the tapered ends.
Caps, on the other hand, cut and contain the foam at the open end of a satin stitch column and consist of a series of small cutting-density satin-stitch columns placed perpendicularly inside a satin column’s open ends. They are made straight on the outer edge and jagged on the inner edge to ensure only the outer edge perforates the foam cleanly. The reason for the jagged edge is to prevent “tip-out,” whereby bits of foam “tip” out of the cover stroke in the top stitching and fall into the inner cut edge.
Caps protrude beyond the last stitch of the topstitching column by roughly 0.5 mm to account for push distortion. If the distance between the end and cap is too short, stitches will “fall” or “roll” off of the end of the cap, making for a sloppy “waterfall” look.
Points: Small, arrow-like “points” consist of three to eight manual stitches placed in a tight, arrowhead shape with a jagged back end set just inside the corner and behind the edge of the main cap to perforate and/or capture any bits of foam that may remain where the cap and covering satin don’t quite meet. They can also help out inside the open edge of a tapered stroke, reducing the need to have to manually poke in any remaining foam during finishing. When used with a tapered point, the cutting point should be set just outside the last stitch of the satin column by no more than about 0.2 mm.
Reinforcing Junctions: The edge of any full density stroke will invariably create a cut in the foam. Where satin strokes meet, this can disrupt the surface as existing strokes split and allow the top stitching in subsequent strokes to fall into the cut. This in turn can result in a deep cleft in the design and/or foam showing through. Adjust your stitch angles to prevent the top satin column from “splitting” the bottom stroke’s stitches where possible by creating “planks” (see next section) that work to combat this effect.
Planks and In-column Planks: The aforementioned planks are comprised of low-density jagged-edged columns of stitching included to create a non-cutting “bridge” over those areas where a pair of satin columns meet. Planks serve to hold the foam together, providing a stable base that will help keep your topstitching from falling into cuts in the foam and/or separating the stitches or foam elements in your underlying columns. In addition, creating a zigzag plank element when the exit of a top-stitching column is not located at the end of a column can help hold down the foam and prevent show-throughs and splitting.
Corner Covers: Similarly, where there is a sharp corner in your design or a point on the edge of a satin column, the sharp corner of foam under these stitches after foam removal can poke through, even with a clean perforation. To prevent this from happening, include a manual zigzag perpendicular to the top stitching to hold down the corner before the foam is fully perforated and stop the poke through at the same time you support the top stitching.
Breaking Out – Beyond the Basics of 3D Embroidery
Creating texture on 3D foam can be achieved in a variety of ways, from simple stitch carving with a programmed texture pattern to custom warped motif columns that combine classic satin-like stitching with a set of serpentine patterns made up of angular bean stitches. Many of the early textured treatments relied on blocks of custom stitching stretched over a standard column structure. With the advent of more filling over foam, though, we’ve seen everything from standard fills to a combination of stipple pathways and rough backstitches to make up faux chenilles.
In practice, these simple textures often have something in common, i.e., they use an initial layer of 3D foam treated much like a standard foam design and then top that with a layer or a series of stitches that serve to break up the stitch angle, thereby adding multiple layers that catch and scatter the light, thereby creating a range of interesting surfaces and patterns.
Case Study – Simple Chain-Stitch Texture Embroidery
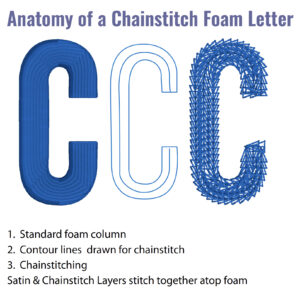
Image courtesy of Erich Campbell
A “knit” or “chain-stitch” foam texture is one of the simplest to achieve. To start out, the 3D foam portion is created using the basic techniques described above, using a full-density satin stitch column. The added texture is then created through the use of a series of contour stitches run atop the finished foam portion. In the example shown at the bottom of this page there are three contour lines in all, each of which consists of a classic triangular chainstitch. The idea here is to create a series of rows that interlock and completely cover the column. In this example, the center line of the outermost contour is inset from the edge a little less half the width of the chain motif, while the centerline is inset just under the width of the motif from the edge contour. This allows the chain stitches to mesh with each other while covering the outside edge of the column.
Note: This kind of textural process works best when the foam color matches the topstitching, as the texture stitches can slightly disrupt and spread the cover stitches of the underlying 3D foam column. This is why so many examples of this work are done in simple, lighter colors in order to maintain a single tone throughout.
Case Study – Simple Beveled Embroidered Letters
The beveled look of the letter shown on the facing page deviates from the classic foam techniques discussed thus far in a number of ways. In the case of this design, we wanted a high central crown that tapers toward the edges coupled with a drop in height and a triangular face on the wide-open stroke ends. In this piece, these effects have been created through the use of a two-layer foam design that builds both a base platform and a central, shaped ridge over which the final topstitching is wrapped after the foam is removed.
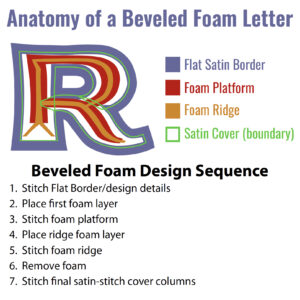
Image courtesy of Erich Campbell
With this in mind, the first layer consists of a simple satin border. Plan a deep overlap under the foam column to avoid any gaps due to minor shifts in the material.
The second layer then consists of a simple foam slab similar to a standard foam letter, inset slightly from the desired width of the finished letter with the “platform” removed under the area of what will eventually be the tapered triangle of the single wide stroke end. In this case, the width of the initial platform is about half the width of the final finished stroke, inset about 25 percent from the edge on each side. The removed end of this platform layer is then stopped at about half the finished stroke width from the end of the column. The edges of this layer are never seen, so the density can be lower, about 2 points, or 0.20 mm, was used here.
The third layer constitutes the central ridge. This was configured to follow the desired shape of the top ridge at 25 percent of the width of the finished letter stroke, with a small inverted “V” made up of a pair of tapered satin-stitch columns at the wide-open end set where the initial platform was cut away. This central ridge follows the center of the stroke, with tapered points running to the corners to create a visible ridge. These satin stitches are at full foam density and inset at the end of both the open and tapered strokes by a little less than 0.10 mm. This prevents the extreme push distortion of the dense satin ridge ends from pushing beyond the final satin stitch.
The final layer consists of a standard satin stitch, digitized at regular embroidery densities—in this case using a 40 wt thread at a density of 4 points, or 0.40 mm. This is applied after the foam is removed with an intentional angular overlap where the lower right stroke of the “R” meets the spine of the letter. A small number of stitches at the end of the wide stroke serve to help anchor the extremely long stitches and keep them flat.
Note: When looking at the stitching order with this design, it becomes clear how the bevel is formed. First, the flat border is stitched. After that the first layer of foam is applied and the foundation layer stitched. Following that, another layer of foam is applied and the ridge layer added.
Finally, the excess foam is removed, revealing a stepped pyramid structure and the final, standard satin stitch is sewn over the resulting ridge and foundation, raising the center of the satin column to its highest point and slightly raising the body of the letter.
Finding your Own 3d Foam Embroidery Technique
Because it is so variable, 3D foam can be a challenge. This can be especially hard when using contract digitizers who may not take into account the methods or materials being employed. Even so, with attention to the foam fundamentals, you can test, learn, find your own favorite settings and make 3D foam an impactful tool for your embroidery designs.
Watch your angles, pay attention to junctions and transitions and use all the stitches you need to cover while omitting as much of the underlay run as you can to avoid crushing your foam prematurely. Achieve a balance between leaving the foam unharmed and stitching it to complete coverage. While you’re at it, don’t be afraid to invest a little more time in your digitizing to help eliminate the amount of finishing work you’re going to have to do after stitching.
Try out textural treatments while maintaining the technical considerations that make simple foam designs run cleanly. By understanding foam fundamentals, experimenting with textures and pricing the added value appropriately, you’ll improve both your embroidery results and your profitability.
Erich Campbell is an award-winning digitizer, embroidery columnist and educator, with more than 20 years of experience. He also is the program manager for the commercial division of BriTon Leap. To reach Erich directly, go to his web site, erichcampbell.com.